![]()
![]()
![]()
![]()
|
|
|
|
|
To create a template, you can:
Administrators and System Administrators only:
The Template Editor opens. A temporary name appears at the top of the template, such as Untitled [template type] Template.
In the figure, numbers designate areas on the screen, which are described below.
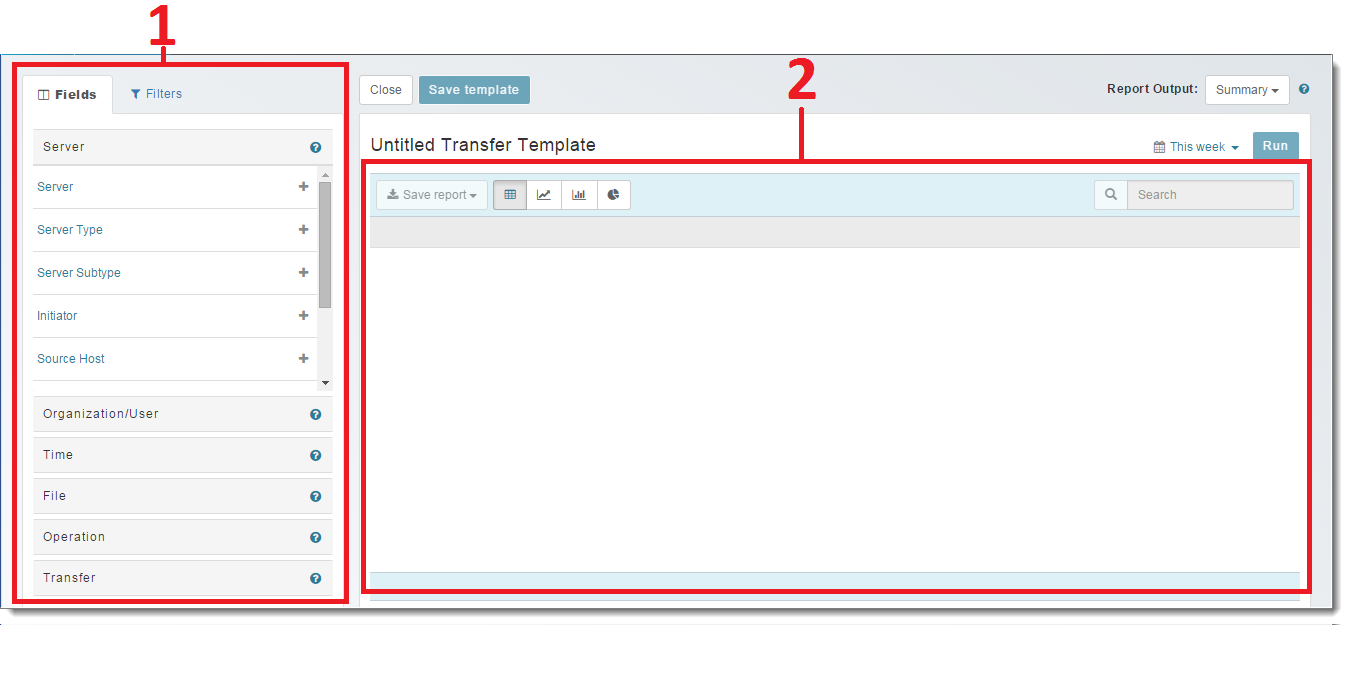
1. Palette
Fields tab: Area where you select the data fields to include in the template. Initially, the Fields palette is empty. Each field that you clidk in the palette appears as a column header in the canvas.
Filter tab (unselected in the figure): Area where you optionally filter data by MOVEit sources.
2. Canvas
The main workspace that contains all of the template's data fields, placed as column headers. New templates do not contain any fields.
In the Template Editor you can:
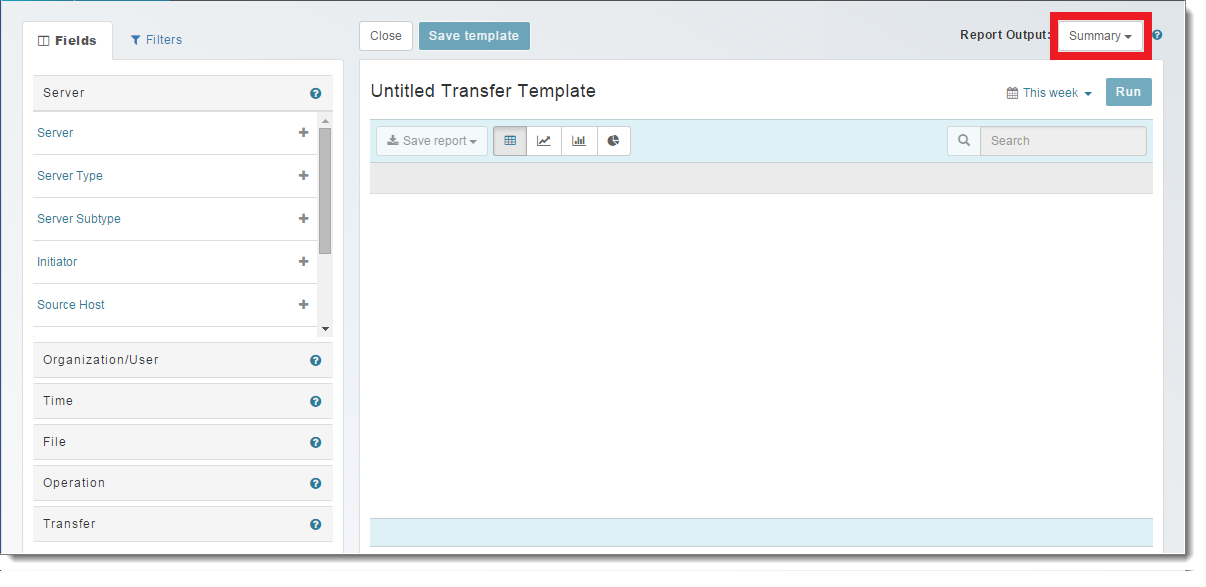
When creating a NEW template, you can opt to display summary or detailed fields in the palette. The Field palette can display only one of these field output types at a time.
Note: Many fields display in the palette regardless of your Report Output selector. Only fields that are specifically Summary versus Detailed are affected by the Report Output selection.
To change the type of fields that appear in the palette, use the Report Output selector, located at the upper right of the Template Editor.
Warning: You will lose all fields that you have already added to the template if you change the Report Output.
A field contains data captured from your MOVEit server(s). The Fields palette contains fields associated with the template type you selected, organized by field type.
In the palette, click a field type to show or hide the fields beneath it. For a complete list of all fields and their definitions, see Field Definitions.
To see a description of the type of data that a field will display in a report, click a field listed in the Palette.
To add a field: In the palette, click the Fields tab, and then click the plus sign (+) next to the field name. The field that you click appears as a column in the template canvas.
Note: A template must have at least one field before you can save it.
 next to the field in the palette.
Click and drag a column heading to the desired position.
Tip: Skip this step if you want to include in the template data from all servers, organizations, and usernames to which you have access.
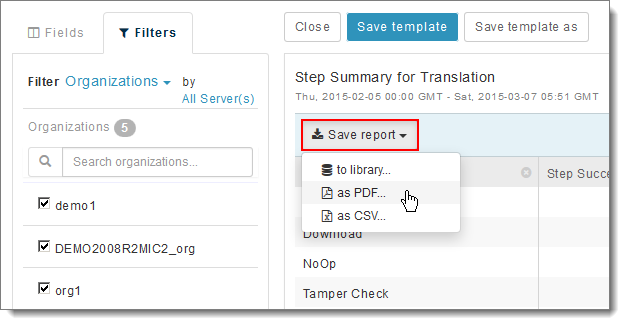
Use filters to include data only from specific MOVEit servers, organizations or usernames, Reports that you generate with the template include data only from the sources you select.
Note: This step includes a brief description of filters. For more information, see Using the Filter Palette.
MOVEit sources are nested. A server contains organizations; organizations contain usernames. You can filter only one level above the current filter type. For example, you cannot filter usernames by specific servers.
In the palette, a source list appears, reflecting your selection.
After you have customized the source list to your satisfaction, optionally select the checkboxes for individual source items to include in the template.
You can add one of each type of graph: line, bar, pie. For more information, see Add Data Visualizations.
At any point you can run the template to populate the template with MOVEit data. First select a time range from the drop-down options in the upper right corner:
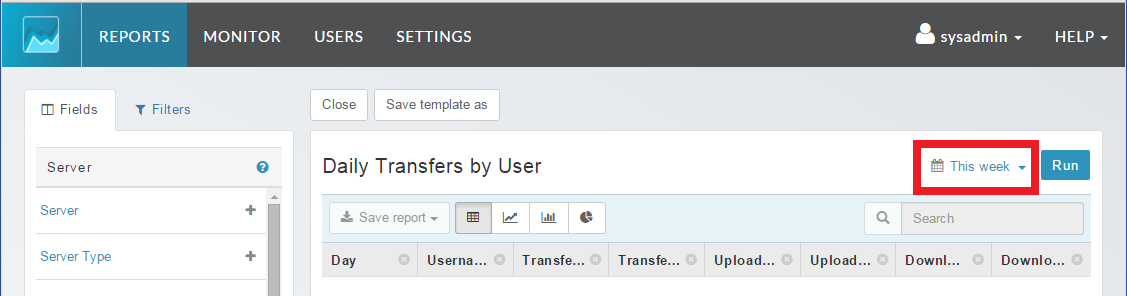
Next click Run to populate the template with the fields you specified using data from the MOVEit source(s) you selected in the Filter.
Note: A template must contain at least one field before you can run it.
Tip: To avoid lengthy report processing times, narrow the filters. For example, select only two servers instead of all servers, or select specific users instead of all users.
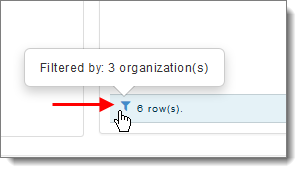
If the template filters by MOVEit source, a blue filter icon appears at the bottom left of the report. To show the filter settings, click the icon.
Click any column heading in the report to sort data in ascending or descending order (arrows indicate sort direction).
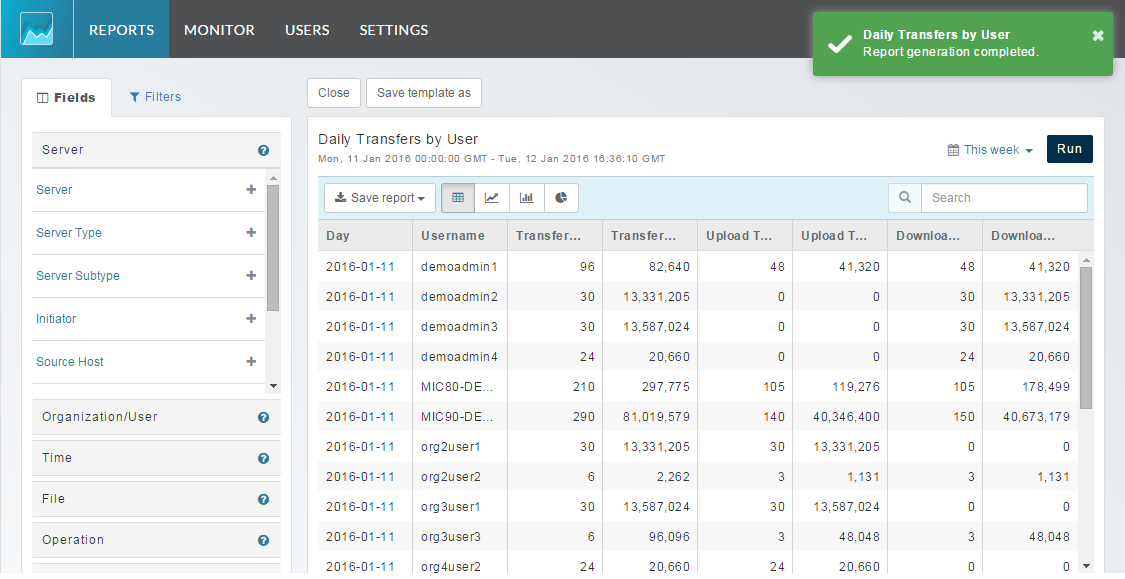
After the template is populated with data, it becomes a report that you can save to the Library, or export and download as a PDF or CSV file. Click Save report and make a selection..
Note: Saved reports do not contain column sorting.
To save your changes to the template, click Save Template and enter the following:
Warning: Once you click Save, you will not be able to change the template's state to private again.
Note: Time ranges are not saved with the template. The time range selector affects only templates run inside the Template Editor.
Tip: You can also click Close to exit the Template Editor without saving the new template, or navigate to any other module.
Click Save.
To exit the Template Editor, click Close or navigate to any other module.