![]()
![]()
![]()
![]()
|
|
|
|
|
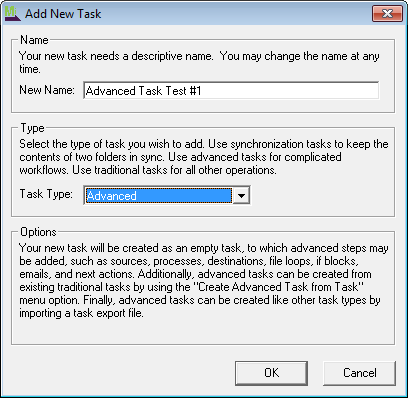
This topic describes how to add a new Advanced Task from scratch. There are many possible configurations of an Advanced Task, so this topic presents the general procedure for adding a new Advanced Task. A second way to create an Advanced Task is by converting a traditional task.
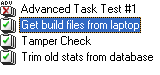
Note that the order and placement of a task element determines when it is processed. If you use a File Loop, the element needs to be within the File loop, if it is to be processed as part of the loop. The same is true for an If Block. To place an element in a loop or block, you can right-click the loop or block, then add the element. You can also use the various Move commands to move an element within the task.
In the example below, the process and the destination are within the File Loop (shown by indenting the process and destination.

Right-click menu options