Administrators use this page to control if unregistered users can send packages. These settings are applied as policy for the current organization.
![]() Important: Ad Hoc Transfer must be enabled before users can leverage these settings. Go to SETTINGS > Ad Hoc Transfer > Access > Registered Senders and for Can unregistered users send packages to registered users? select Yes.
Important: Ad Hoc Transfer must be enabled before users can leverage these settings. Go to SETTINGS > Ad Hoc Transfer > Access > Registered Senders and for Can unregistered users send packages to registered users? select Yes.
A statement at or near the top of the section will state whether Ad Hoc Transfer is set to provide temporary or guest access for unregistered senders. This reflects your selection on the Ad Hoc Transfer - Access - Unregistered Recipients page, in the first prompt.
Note: If you have not allowed users to send packages (on the Ad Hoc Transfer - Access - Registered Senders page, in the first prompt, by selecting either the first or third option), a statement will be displayed on the top of the Unregistered Senders section to inform you that these settings will not be used because Ad Hoc Transfer is disabled. It will say: Ad Hoc Transfer is not enabled for all users. None of the settings on this page will take effect; to change this, go to the Registered Senders setting page. (To change this, go to the Ad Hoc Transfer - Access - Registered Senders page. Under the first prompt, select the second option.)

This setting specifies whether unregistered users are allowed to self-register to send.
Note: If you select this option, no additional prompts are displayed on this page.
Note: If you select this option, additional prompts are displayed on this page.
Note: The next prompts and their setting options (in the Unregistered Senders section of this page) are tailored to either Temporary Users or Guest Users, based on your selection on the Ad Hoc Transfer - Access - Unregistered Recipients page, in the first prompt.
Note: The following prompts and options are shown if Temporary User is selected on the Ad Hoc Transfer - Access - Unregistered Recipients page, in the first prompt.

Note: This prompt is displayed only if Temporary User is selected on the Ad Hoc Transfer - Access - Unregistered Recipients page, in the first prompt.

Note: This prompt is displayed only if Temporary User is selected on the Ad Hoc Transfer - Access - Unregistered Recipients, in the first prompt.
![]() If you are enabling reCAPTCHA for the first time, you will need to add the public and private keys. For more information, see the topic titled User Auth.
If you are enabling reCAPTCHA for the first time, you will need to add the public and private keys. For more information, see the topic titled User Auth.
Note: The following prompt is shown with these two options if Package Password is selected on the Ad Hoc Transfer - Access - Unregistered Recipients page, in the first prompt.

Note: The following prompt is always displayed.
This setting allows administrators to limit the number of recipient email addresses that the self-registered sender can enter in their first or only package. This helps prevent newly self-registered users from sending to too many users.
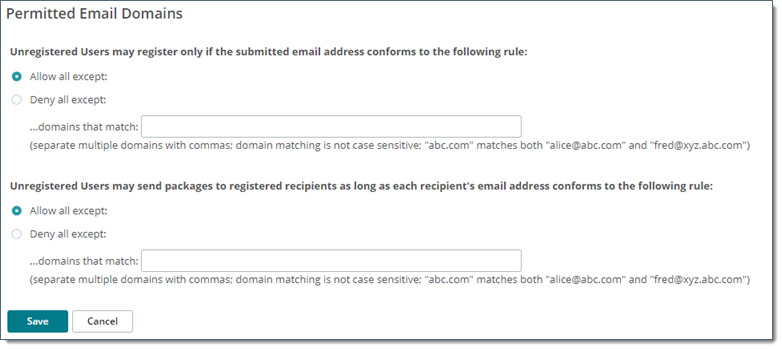
This section allows administrators to limit the domains for the registered recipient email addresses. This helps prevent users from sending to certain registered users if they should be unable to. The domain list is a comma-delimited list of domains to match against. The rule settings determine whether matched domains will be allowed or denied.

This section allows administrators to limit the Hostnames and IP addresses and ranges for unregistered sender remote access. This helps prevent or allow unregistered users access. The rule list is created and edited on a separate page accessed from the Edit Access Rules link. The existing access rules are listed on the Unregistered Senders page. At runtime, the rules will be processed in the top-to-bottom order displayed here.
There are several columns for each rule as follows:
In addition, an Edit Action Rules link below the last rule opens a separate page for editing and adding access rules. Click this link to open the Unregistered Sender Remote Access Rules page.
On this page, you can change details about the rules.

Buttons and links are provided for the various actions which may be performed on each rule.
In addition, the Add New Remote Access Rule link (below the last rule) opens the Add Remote Access Rule page, where new rules can be added.
Note: See the Web Interface - Settings - Security - Remote Access Policy subsection Add Remote Access Rule and Edit Remote Access Rule Pages.