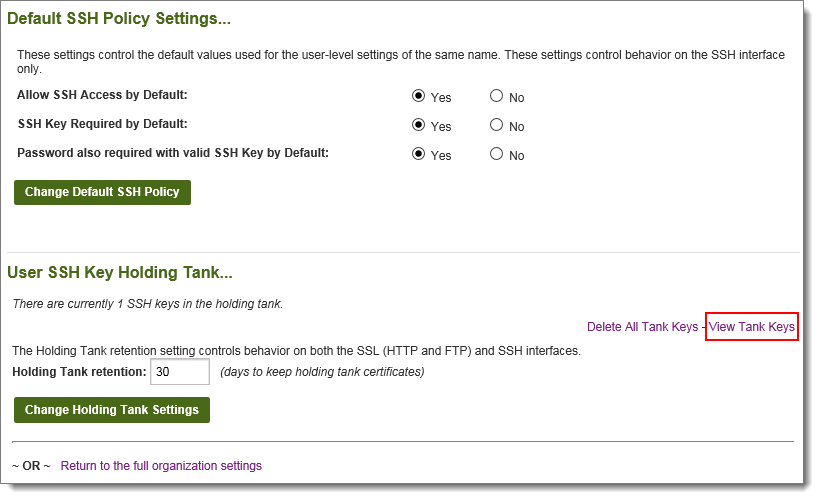
The SSH Key holding tank holds keys that have been presented by various users as authentication credentials but have not yet been accepted as valid credentials for those users. The holding tank is populated automatically whenever a valid username is presented along with an invalid key AND the sign on fails (typically the signon fails because a key was required).
The use of a holding tank in key authentication situations makes it easy for administrators to "click-accept" specific keys for users without having to manually copy or type keys into a user profile.
For detailed information about configuring the SSH Keys policy, please also see the Interface Policy documentation page.
The following procedure describes how an SSH client can connect with a new key and leave the key's fingerprint behind for an administrator to promote/accept into the user's profile at a later date. Any SSH user whose client has already generated and installed an SSH client key should be able to use this procedure.
First, have the remote SSH client attempt to connect to MOVEit Transfer. This connection should fail. For example, the following OpenSSH for Windows session attempts to connect with a client key and fails.
D:\temp>sftp -oUserKnownHostsFile=c:\progra~1\OpenSSH\bin\ssh\known_hosts
-oIdentityFile=c:\progra~1\OpenSSH\bin\ssh\id_rsa sshkeyboi@moveit.myorg.com
Connecting to moveit.myorg.com...
sshkeyboi@moveit.myorg.com's password:
Authenticated with partial success.
Permission denied (publickey).
Connection closed
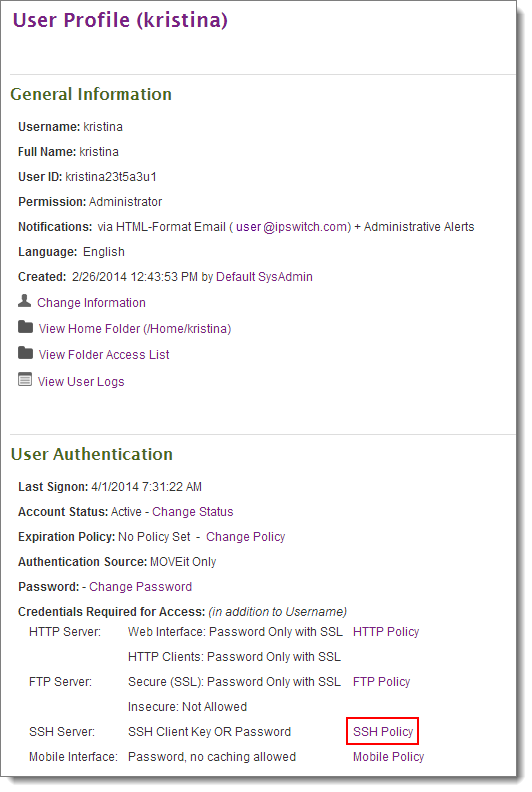
Next, sign on as an Admin to MOVEit Transfer and go to the User Profile of the user that just tried to authenticate. Click the SSH Policy link. (Or, go to the organization holding tank under Settings | Security | Interface Policy | SSH...)

Double-check the fingerprint and especially the time of the key fingerprint you are about to add and then click the Accept link.
Warning: An administrator should accept a key from the holding tank only if there is good reason to believe that the connection attempt that resulted in the holding tank entry actually came from the authorized user.

If a valid key was provided, a success message appears, and the key is in the Current SSH Keys section. A single user can be associated with multiple SSH keys; this is especially useful if a user uses the same account name from multiple machines.

Finally, to make sure the key will be solicited from the SSH client and/or that the key will be a required credential, see the Edit SSH Policy section and check the boxes appropriately.
If you plan on using OpenSSH in batch mode, you should use the following settings (require_key = yes, require_pass_with_key = no). If you want to enforce "two-factor" authentication, enable all of the following settings (require_key = yes, require_pass_with_key = yes).

A complete list of all unassigned keys for all users in the organization may be viewed in the organization-wide holding tank. The organization-wide holding tank is accessible from the Settings page by following the Security | Interface Policy | SSH link. To assign specific keys, click into the complete list with the View Tank Keys link.

Keys are listed by username. Select the appropriate key and click the Accept link next to it. After a key has been accepted, the interface will return to the organization-wide holding tank so other keys may be assigned or deleted.

Unassigned keys will automatically be cleaned out the holding tank after a certain number of days. The exact number of days is a configurable option under the organization-wide SSH policy. (The same value applies to unassigned SSL client certs and untrusted CA certs in the holding tank.)
Unassigned keys may also be manually cleaned out an individual user's holding tank or the organization-wide holding tank using any of the provided delete all links.