Configuring a Dashboard Screen Manager playlist
Keep in mind that you need to set up a playlist for each physical monitor on which you want to display Web pages through the Dashboard Screen Manager.
To configure a single Web page playlist:
If you have chosen not to run the Dashboard Screen Manager upon Startup, click Start > Programs > Ipswitch Dashboard > Dashboard. The Dashboard Operations dialog appears.
- or -
If you have chosen to run the Dashboard Screen Manager upon Startup, on the display you want to configure a playlist for, click on the screen and the Dashboard Operations dialog appears.
- On the Dashboard Operations dialog, select Playlist for this Monitor. The Pane Properties dialog appears.
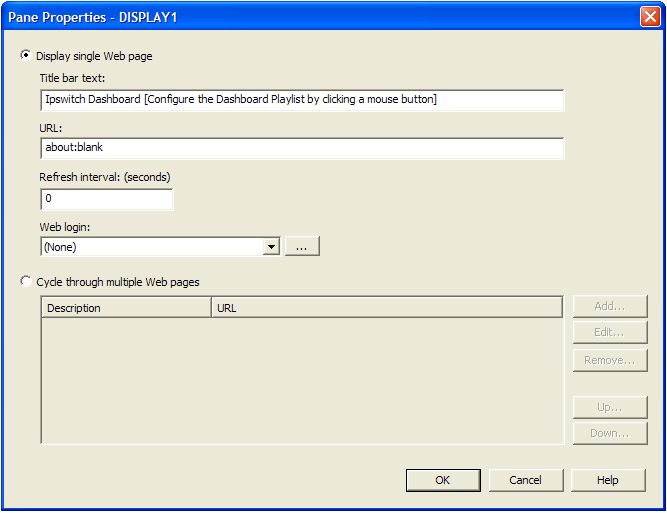
- Select Display single Web page.
- Enter the appropriate information in the following boxes:
- Title bar text. Enter the title bar name for the Dashboard display.
- URL. Enter or paste the URL for the Web page you want to display in the following format:
http://www.websitename.com/webpagename - Refresh interval (in seconds). Enter an amount of time (in seconds) for how often you would like the Web page to refresh.
- WhatsUp Gold Web login. Either select a user from the list, or click the browse (...) button to choose a user from the WhatsUp Gold Web Login Library. This user account is used for the Dashboard application to log-in to a password protected site. Without a proper user account, the application is not able to display a password-protected Web page. If you are using a non-WhatsUp Gold Web page, set the Web login to None.
Note: Other applications requiring a username and password to display Web pages can be used in the Dashboard Screen Manager. You can specify these other application username and passwords in the URL box, appended to the Web page URL.
- Click OK to save changes.
Important: The Web Login list is empty until you populate the Web Login Library with users. You can do this via the Web Login Library dialog.
To configure a multiple Web page playlist:
If you have chosen not to run the Dashboard Screen Manager upon Startup, click Start > Programs > Ipswitch Dashboard > Dashboard. The Dashboard Operations dialog appears.
- or -
If you have chosen to run the Dashboard Screen Manager upon Startup, on the display you want to configure a playlist for, click on the screen and the Dashboard Operations dialog appears.
- On the Dashboard Operations dialog, select Playlist for this Monitor. The Pane Properties dialog appears.
- On the display for which you want to configure a playlist, select Playlist for this Monitor. The Pane Properties dialog appears.
- Select Cycle through multiple Web pages.
- Click the Add button to add Web pages to the list. The Add URL to Playlist dialog appears.
- Enter the appropriate information in the following boxes:
- Title bar text. Enter the title bar name for the Dashboard display.
- URL. Enter or paste the URL for the Web page you want to display in the following format:
http://www.websitename.com/webpagename - Refresh interval (in seconds). Enter an amount of time (in seconds) for how long you would like the Web page to be on the screen.
- WhatsUp Gold Web login. Either select a user from the list, or click the browse (...) button to choose a user from the WhatsUp Gold Web Login Library. This user account is used for the Dashboard application to log-in to a WhatsUp Gold Web page. Without a proper user account, the application is not able to display a password-protected Web page. If you are using a non-WhatsUp Gold Web page, set the Web login to None.
Note: Other applications requiring a username and password to display Web pages can be used in the Dashboard Screen Manager. You can specify these other application username and passwords in the URL box, appended to the Web page URL.
- Click OK to add the new Web page to the playlist.
- Edit and Remove Web pages by selecting a Web page from the list and then clicking the Edit or Remove button.
- Click OK to save changes.