Example: Email Monitor
This example creates an Email Monitor that checks to see if an account on Google's Gmail service is working properly. To test and use the Email Monitor created in this example properly, you need a working Gmail account configured to allow POP3 and SMTP access.
To create an Email monitor for a Gmail account:
- From the WhatsUp Gold web interface, go to Admin > Monitors. The Monitor Library dialog appears.
- Click the Active tab inside the dialog.
- Click New. The Select Active Monitor Type dialog appears.
- Select the Email monitor, then click OK. The Add Email Monitor dialog appears.
- Enter or select the appropriate information in the dialog boxes:
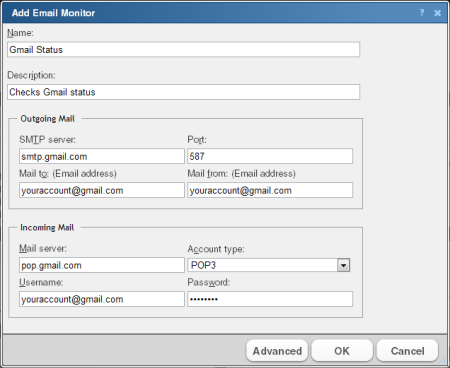
- Enter
Gmail Statusin Name. - In Description, enter
Checks Gmail status.In the Outgoing mail section of the dialog:
- Enter
smtp.gmail.comin SMTP server. - Enter
587for the Port. - If you have a Gmail account, enter it in Mail to, in the following format:
youraccount@gmail.com. If you do not have a Gmail account, create one on the Gmail site. - Enter the same Gmail account in Mail from.
In the Incoming mail section of the dialog:
- Enter
pop.gmail.comin the Mail server box. - Choose POP3 from the Account type list.
- Again, enter your Gmail account in Username.
- Enter the password for your Gmail account in Password.
- Enter
- Click Advanced. The Advance Monitor Properties dialog appears.
- Enter or select the appropriate information:
In the SMTP advanced properties section of the dialog:
- Select Use SMTP authentication.
- Enter your Gmail account in Username.
- Enter the password for your Gmail account in Password.
- Select Use an encrypted connection (SSL/TLS).
- Use the default Timeout of 5 seconds.
In the POP3 advanced properties section of the dialog:
- Enter 995 for the Port
- Select Use an encrypted connection (Use SSL with TLS).
- Use the default Timeout of 5 seconds.
- Click OK to save changes and return to the Add Email Monitor dialog.
- Click OK on the Add Email Monitor dialog to add the Gmail Monitor to the Active Monitor Library.
- Test the Gmail Status monitor.
- From the WhatsUp Gold console, go to Configure > Active Monitor Library. The Active Monitor Library dialog appears.
- Select the Gmail Status monitor, then click Test.
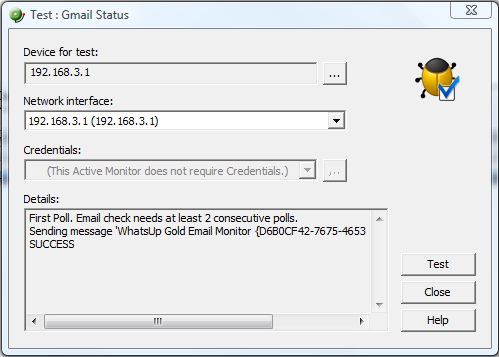
The Test dialog will list the test as either SUCCESS or FAILED.
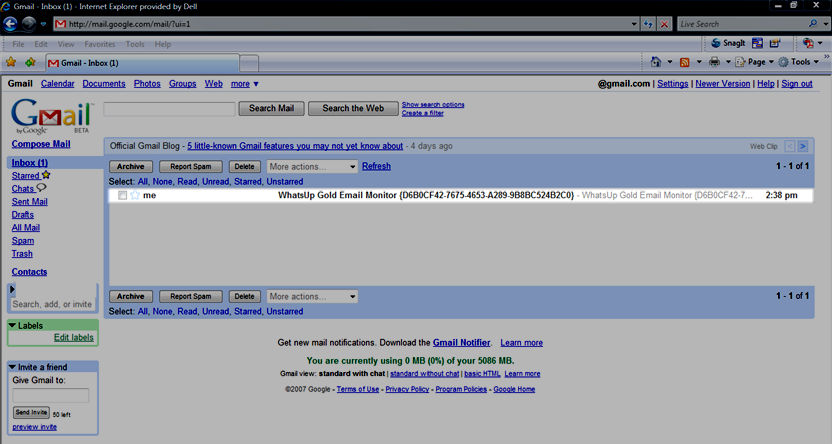
You can log in to the Gmail account used for the Gmail Status monitor and actually see the email sent by WhatsUp Gold via the Email Monitor.