Manage Notification Policies
Managing Manage Notification Policies:
From the Notification Policies Library in the WhatsUp Gold Alert Center Libraries view, you can perform the following Manage Notification Policies operations.
.  Create new Manage Notification Policies.
To add a notification policy to the Notification Policies Library:
- From the Notification Policies Library, click the 'add' icon().
The New Alert Center Notification Policy dialog displays.
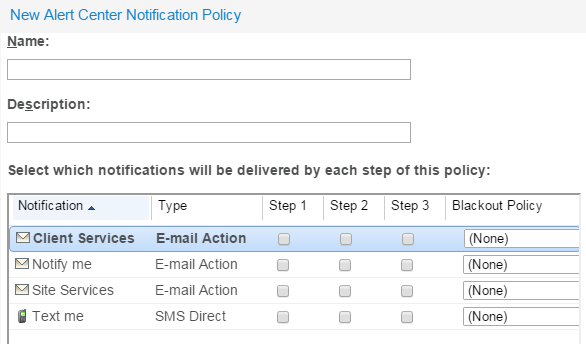
- Modify the appropriate information.
- . Identifies the policy in the Alert Center Notification Policies dialog.
- . Optional description.
- Click the , , and checkboxes to select a notification schedule for each notification profile and for each of the three (3) phases in the notification policy sequence.
- Step 1 of the notification policy begins as soon as an item falls out of the threshold.
- Click browse () to open the Notification Library and configure a new notification.
- Specify time interval between .
- You can choose to repeat Step 3 of the policy at a regular interval until the notification is stopped. By default, the policy is set to repeat step 3 every hour until the notification is stopped.
- In order for the repeat function to work properly, Step 3 must be enabled for at least one notification in the policy.
- Click
 to see the escalation schedule.
- Click to apply your changes and save them to the Notifications Policy.
.  Adjust, tune, and configure existing Manage Notification Policies.
To edit a notification policy in the Notifications Library:
- Select an existing Notification Policy, then click the pencil button ().
The Edit Alert Center Notification Policy dialog displays.

- Edit text fields.
- . Identifies the policy in the Alert Center Notification Policies dialog.
- . Optional description.
- Click the , , and checkboxes to select or clear the notification schedule for each notification profile and each of the three (3) phases in the notification policy sequence.
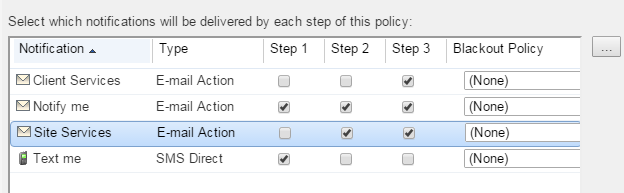
- Specify time interval between .
- You can choose to repeat step 3 of the policy at a regular interval until the notification is stopped. By default, the policy is set to repeat step 3 every hour until the notification is stopped.
- Click to see a graphical schedule of the escalation steps.
- Click to apply your changes and save them to the Notifications Policy.
.  Create policy cloned from the configuration of existing Manage Notification Policies.
Clone a notification policy based on an existing policy:
- Click on a Manage Notification Policies you want to copy, from the Manage Notification Policies panel.
- Click the button, and click to create a new Manage Notification Policies.
The Edit Manage Notification Policies dialog displays.
- Save or customize your new Manage Notification Policies, either:
- Type in a new value for Name field (or keep the default) and click to save to the Manage Notification Policies Library.
- Follow the Edit Manage Notification Policies instructions.
.  Remove Manage Notification Policies from library.
Delete a Manage Notification Policies:
- Click an existing Manage Notification Policies you want to delete from the Manage Notification Policies Library panel.
- Click the button, and then click to confirm the deletion.
The Manage Notification Policies configuration is deleted.
 Add.
Add.