Adding Remote/Central workspace reports to your Home Workspace
You can add new Remote/Central workspace reports, including Top 10 reports, to the home workspace to customize workspace reports to best suit your needs. In the Workspace toolbar, click Add Content.

Use the Add Content To View dialog to add one or multiple Remote/Central workspace reports to a workspace.
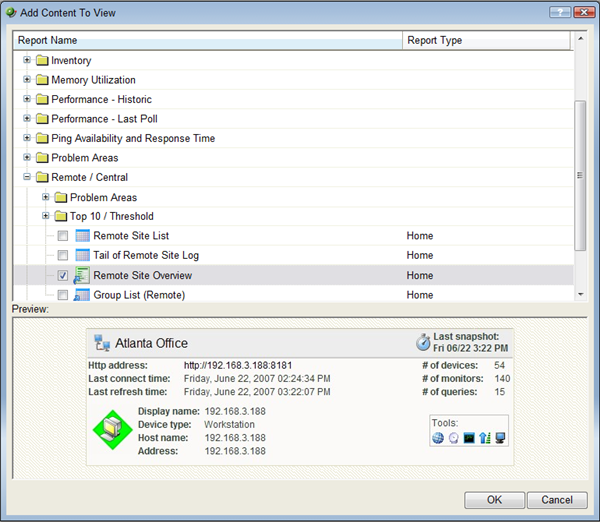
Note: The Tail of Remote Site Log is the only workspace report only available from the Remote Site.
To add a workspace report:
- Click the + button next to a report category folder, then click a report option box for each report you want to add to your workspace. A preview image for each workspace report is displayed at the bottom of the dialog.
Tip: The Central/Remote reports shortcut icons

 indicate that the report data originates from a Remote Site.
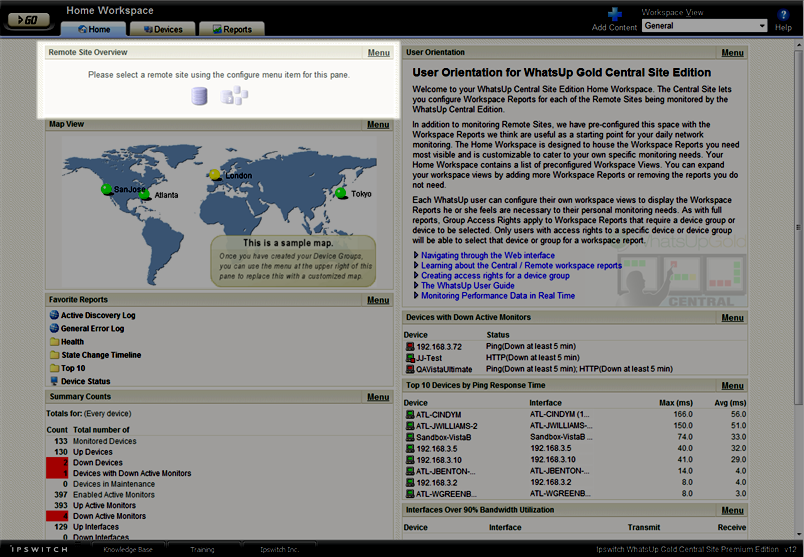
 - Click OK to save changes. The Home Workspace opens with the new workspace report added to the page. Also, notice the gray server icons when you first add a Remote Site workspace report. This indicates that you need to select a remote site for the workspace report.
- In the new workspace report, click Menu > Configure.
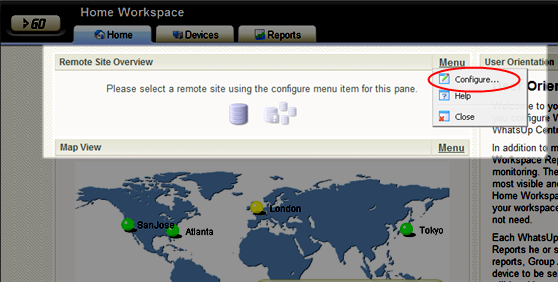
The Configure Remote Report dialog opens.
- Select the Remote Site you want to add to the Home Workspace, select other options available in the dialog (the options vary depending on the workspace report you selected), then click OK. The new workspace report displays in the Home Workspace.
(Additional options available only for the Remote Site Overview workspace report.)
- After you select a Remote Site, the Local device box displays in the dialog. Click the Browse (...) button next to the Local device box. The Edit Remote Site dialog opens.
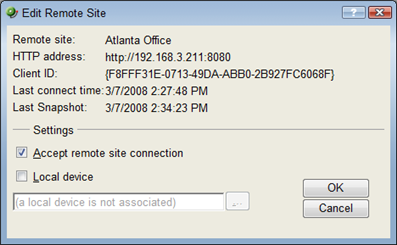
- The Accept remote site connection option is selected by default. It allows users with rights the ability to select or deselect (from the Central Site) the option to accept connections from Remote Sites.
The primary reason to clear the check box option is if you need to disable the Central Site from accepting connections from this Remote Site. For example, if one of the Remote Sites connected to the Central Site has an unusual amount of activity and is using too much bandwidth between sites, you can use this option to disable the Central Site from accepting connections from this Remote Site until you resolve the problem.
Use the Local device checkbox to associate a device with the Remote Site. This device is often the computer that is running the WhatsUp Gold software on a Remote Site. Associating a local device allows you to view the device status from the Remote Site, keeping you informed about the connection status with the Remote Site. It also provides easy access to the Network Tools for the local device you selected. Click the Browse (...) button, next to the Local device box, for a list of devices on the Remote Site. The Select a Device dialog appears.
- Select a device that you want to associate with the Remote Site workspace report. This device will display in the workspace report. Click OK, then click OK to close the Edit Remote Site dialog. The Configure Remote Report dialog appears.
- Click OK to save changes. The Home Workspace opens displaying the green collecting data icons. The icons indicate that the Remote Site has connected and is collecting data for the Central Site.
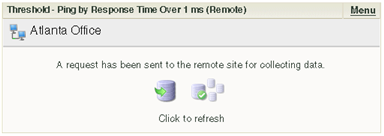
The Remote Site will update shortly or you can click the icons to force a refresh of the Remote Site data.