You should consider using Windows Server's IIS SMTP server as a local mail relay on your MOVEit Central system any of the following conditions apply.
MOVEit Central can send files by email, or send email alerts on completion of a task. These notifications happen as part of the task run, so MOVEit Central must wait for each message to be sent before the task is completed. When MOVEit Central is dealing with busy email servers or large numbers of recipients, tasks may run significantly longer than normal. To keep MOVEit Central from having to wait for each message to be sent, we can instead spool these messages to a local SMTP server which will queue up the messages and send them out to "real" email servers when they are better able to accept the traffic.
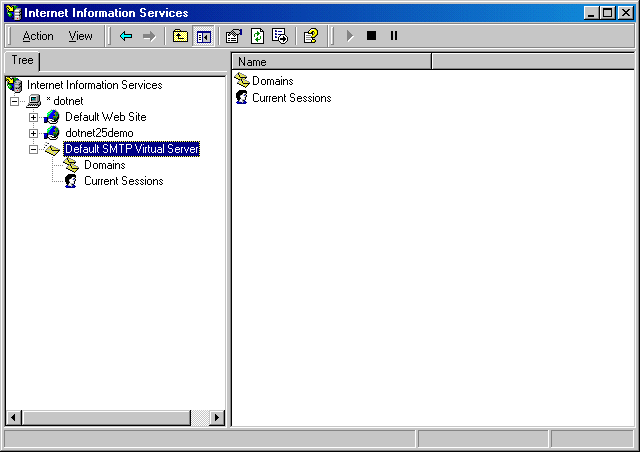
Ensure that you have the SMTP component installed in your local IIS server. When installed correctly, you should see a Default SMTP Virtual Server node in your IIS administration window under the local machine. If you do not have the SMTP component installed, or do not have IIS installed, you will need to install them through the Add/Remove Windows Components option of the Add/Remove Programs window, which can be found in the Control Panel.
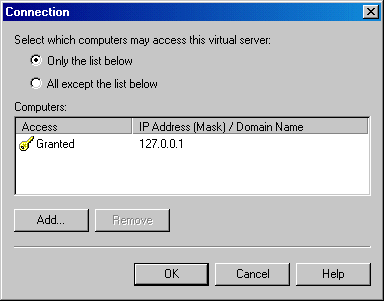
Open up the properties window of the SMTP service by right-clicking on the SMTP service node and selecting Properties. In the properties window, select the Access tab. In the Access tab, open the Connection Control window by clicking on the Connection button in the Connection Control section. Restrict access to the SMTP server by selecting the Only The List Below option and adding the localhost IP address 127.0.0.1 to the access list. Click OK to exit the window.
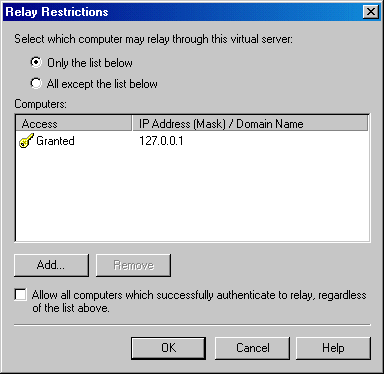
In the Access tab, open the Relay Restrictions window by clicking the Relay button in the Relay Restrictions section. Restrict relay access to the SMTP server by selecting the Only The List Below option and adding the localhost IP address 127.0.0.1 to the access list. Make sure the Successful Authentication Relay option is turned off. Click OK to exit the window.
In the Properties window, switch to the Messages tab. In the Messages tab, turn off all the message limits.

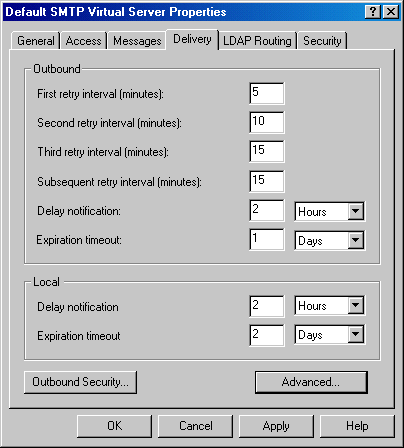
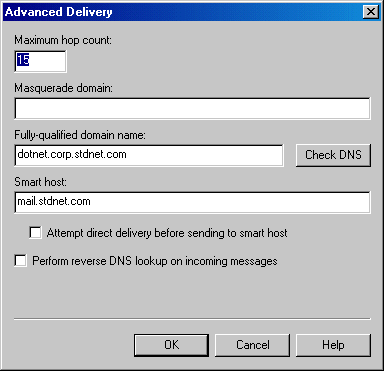
In the Properties window, switch to the Delivery tab. In the Delivery tab, change the default delivery intervals and timeouts to smaller values. Recommended values are shown in the image below.
In the Delivery tab, open the Advanced Delivery Options window by clicking the Advanced button. Set the Fully Qualified Domain Name setting to the name of your MOVEit Central server. Set the Smart Host setting to the name of your main SMTP server. Click OK to exit the window. Configuration of the SMTP server is now complete. Click OK in the Properties window and make sure the SMTP service is started.
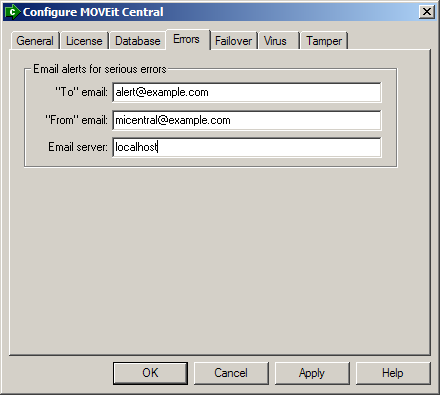
The final step is configuring your Central server to use the new local SMTP service. First, open the MOVEit Central Config program (Start -> Programs -> MOVEit Central) and switch to the Errors tab. Enter localhost as the "Email server" value. Click OK to exit the Config program. The change should happen immediately; no restart is required.
Next, sign on to the Central server using MOVEit Central Admin and switch to the Hosts tab. If you have an SMTP host configured for your outgoing email server, open it by double-clicking the host entry and change the Host value to localhost. Remove any authentication values as they will not be needed.
You will probably want to tinker with the "outgoing connection limit" (default is 1000) if one of your goals is to keep MOVEit Central from overloading your "real" mail server. (Typical "throttled" values are from 1-5.) To alter this setting, open the SMTP properties, go to the "General" tab and open the "connection" dialog.
Your local SMTP relay server should now be set up, and your MOVEit Central server configured to use it. If you have any questions about or problems with this process, please use your support account to access the secure messaging facility on https://moveitsupport.ipswitch.com. Alternatively, you may email MOVEit support at moveitsupport@ipswitch.com or call 608-227-6100 (US). Office hours are 9am to 5pm CST.
If you are running MOVEit Central Failover, you must repeat this procedure on each node in the cluster.
Problem: Cannot connect to local mail relay.
Solution 1: Open the "Services" from "Start | Program Files | Administrative Tools". Make sure the "Simple Mail Transport Protocol" service is started and that it is set up to start "Automatically."
Solution 2: Open the "Internet Services Manager" from "Start | Program Files | Administrative Tools". Make sure the "Default SMTP Virtual Server" is NOT "stopped".
Solution 3: Open the "Internet Services Manager" from "Start | Programs | Administrative Tools". Right-click on "Default SMTP Virtual Server" and select Properties. In the General tab make sure the IP Address is set for "All Unassigned".
Solution 4: Go to the command line and type "netstat -a -n". Look for any TCP entries with a local address ENDING with ":25". If there are none, the SMTP server failed to bind to its listening port; reboot the server.
If MOVEit Central reports that it is sending email OK, but the mail messages are not actually reaching their destination, open the local SMTP server queue folder and look for messages there which correspond with your MOVEit Central messages. (The queue folder is usually named something like "c:\inetpub\mailroot\queue".)
Problem: Mail is being queued on the local SMTP server and is not being delivered.
Solution 1: Make sure your SMART HOST contains the value which used to be the Email Server field in your MOVEit Central configuration.
Solution 2: Make sure the "Attempt Direct Delivery" box (near the Smart Host setting) is NOT CHECKED.
Solution 3: Look for entries in your SYSTEM event log from SMTP or SMTPSVC which complain about "DNS" problem. If you see events like these, change the SMART HOST (described above) to an IP address surrounded by square brackets. (e.g. "[66.170.5.142]")