![]()
![]()
![]()
![]()
|
|
|
|
|
The "user profile" page provides information about a single user and links to edit permissions, access rules and other attributes. The following sections are currently available on this page:
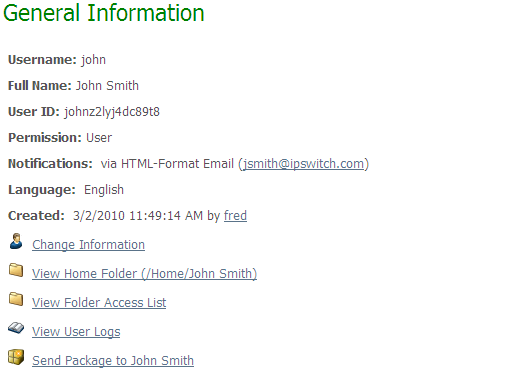
This link allows administrators to change the full name, email address, and other general properties of this user.
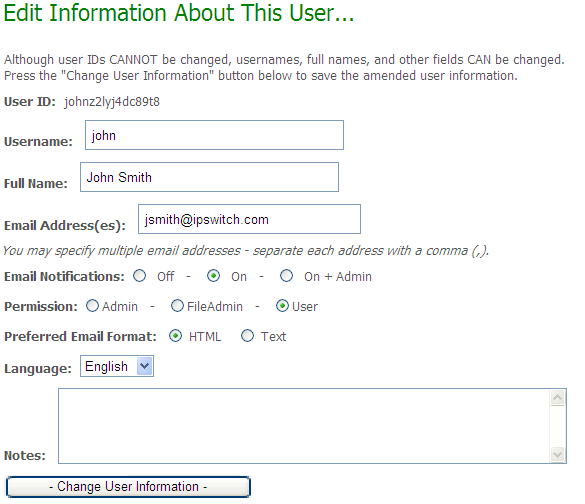
Note: This option must be set to "On" or "On+Admin", AND a valid email address must be present for email notifications to be sent to this user.
Hint: It is usually best to derive home folder names from usernames (which are usually changed less frequently) rather than full names if you anticipate several full name changes in a environment in which automated transfers are wide-spread.
Hint: DISABLE notifications on your automated users, especially any FileAdmin users used by MOVEit Central to connect to MOVEit DMZ. A blank email address will also be treated like a disabled notification.
If the user is a Temporary User, an option will be provided on this page to convert the account to a full End User. To do so, simply click the "Promote Temp User to End User" button. When this is done, a home folder is created for the user, and any limited group memberships the Temporary User has will be converted to normal memberships. The user will also be switched to use the default End User expiration profile, if one is currently assigned in the organization. For more information about the differences between Temporary Users and End Users, see the User Permissions page.
There are four convenience links which may be displayed on a user profile:
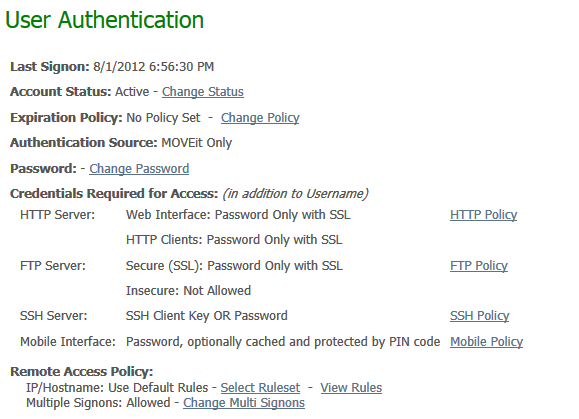
This line shows the date and time of the user's last successful signon.
User accounts may be "Active", "Inactive", or "Template". Only when an account is "Active" will users be allowed to sign on to it. Clicking the "Change Status" link will allow an administrator to change the status of the user.
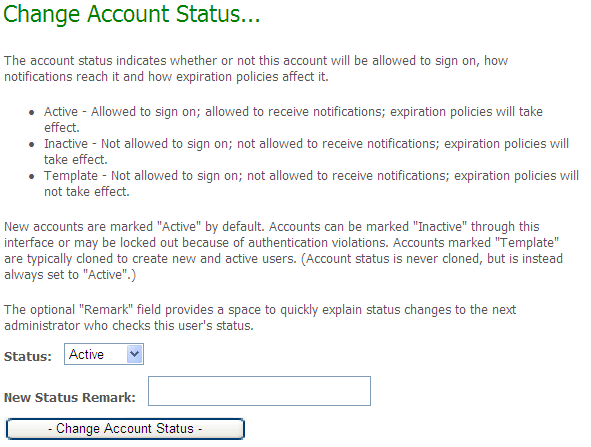
"Inactive" accounts are not allowed to sign on and do not receive email notifications. Accounts may be manually set to "Inactive", or they may be set "Inactive" automatically for one of several possible reasons, such as failure to change a password within a specified amount of time or too many attempts to guess an unknown password during login.
Administrators may either manually unlock an inactive account or, in the case of too many bad password attempts, simply wait for a timer to automatically unlock an account. (Accounts locked for security reasons are also visible on an administrator's home page; email notifications of such lockouts are also sent to all administrators with "admin notifications" turned on.)
"Template" accounts are also not able to sign on and do not receive email notifications. The difference between "Inactive" and "Template" accounts is that template accounts are not subject to account expiration, even if an expiration policy is set on the account. As a result, template accounts are typically used as a parent account for user cloning, both for manually created users, and for users created automatically (such as by an External Authentication source). In these cases, the resulting user will have the same expiration policy and other settings as the template account, but unlike the template account, will be subject to that expiration policy.
User accounts may be assigned expiration policies either by user class or individually. The expiration policy assigned to the user will be listed here, and an indication will be provided if the user is currently expired by that policy. Clicking the "Change Policy" link will allow an administrator to change the policy assigned to the user.
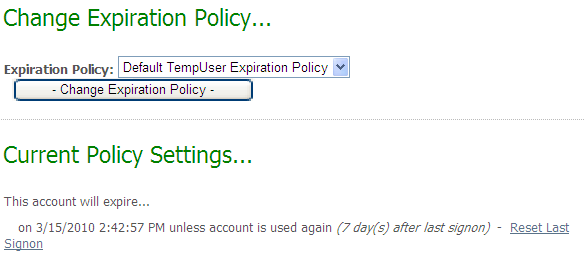
On this page, the current expiration policy assigned to the user will be shown, along with the details of when the user will be expired by each method enabled in the policy itself. If no policy is assigned, "- None -" will be shown. Selecting a different policy and clicking the Change Expiration Policy button will change the policy assigned to the user.
Note: If an expired user account is deleted, the user's home folder will also be automatically deleted, unless someone else has explicit permissions to that user home folder.
Under Current Policy Settings, an information string is displayed stating the details of when the user will be expired according to the current policy. As applicable, a link might be provided to enable reset. For example:
"This account will expire...
on 8/30/2012 1:06:53 PM unless account is either used again or receives a new package (7 day(s) after last signon or received package) - Reset Last Signon
Note that while users with a status of "Template" can have expiration policies assigned to them, they are not actually subject to the rules of that policy. However, users cloned from such an account will have the same expiration policy assigned initially and will be subject to the policy's rules.
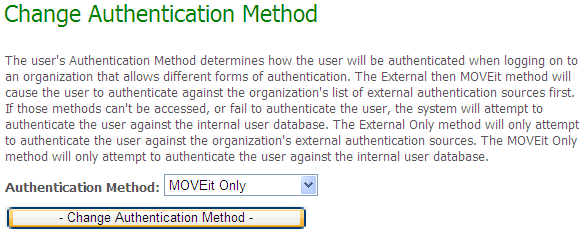
This line shows which authentication source the user is currently using. The possible authentication sources are:
Note: When a user is configured for External Only authentication, they will not be allowed to change their password through the Account Options page. All password changes will need to be done through the external authentication server itself.
A link will also be shown when the organization is set to use both external sources and the internal user database for authentication, to allow an administrator to change the user's authentication method. Also available to change is the user's external authentication source affinity, which determines which external authentication source the user primarily authenticates with (for more information about external authentication, see the Authentication Method section of the Settings - Security - User Policy page).
For users created automatically by an external authentication signon, the authentication method and the authentication source affinity will be set automatically. The authentication method applied to users created in this manner can be configured for each external authentication source in the organization. The authentication source affinity is automatically set to the authentication source that the user was created from.
The Password line shows the current status of the user's password. If password aging is enabled, it will show the number of days left until the password expires, and the number of days until the user will be warned of password expiration, if password expiration warning is enabled. The Change Password link opens the Change Password page, which allows the administrator to change the password and several password related settings for the user.
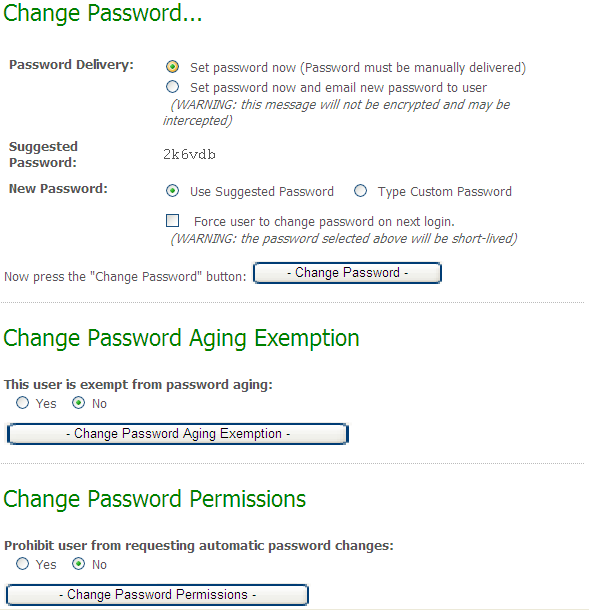
Admin may choose to use the suggested password, or enter their own password, by selecting the appropriate New Password option. If the Use Custom Password option is selected, a new password field, and a password confirmation field will appear for the admin to enter the new password. The clickable keyboard is available here for entering new passwords, to help thwart keystroke loggers.
Note: Maximum Password length is 32 characters. Any new password created which exceed the 32 character limit, will be truncated to first 32 characters.
The "Email password to user" checkbox, when checked, will cause an insecure plain-text email notification to be sent to the user with their new password. This feature is only available if the organization has allowed the sending of password notifications. Enabling this option will automatically turn on the "Force user to change password" option, for security reasons.
The "Force user to change password on next login" checkbox, when checked, will require the user to change their password on their next login. If the user is currently suspended because their password expired, another checkbox will appear allowing the administrator to re-activate the user at the same time their password is changed.
The "Change Password Aging Exemption" section allows an administrator to designate this user as exempt from the usual password aging restrictions which would normally force this user to change his or her password every X days. (Password complexity, password history and other password strength requirements remain in effect even if this option is checked.)
Hint: Consider exempting automated users from password changes, especially any FileAdmin users used by MOVEit Central to connect to MOVEit DMZ.
The "Change Password Permissions" section allows an administrator to prohibit a user from requesting an automatic password change, even if the current organization settings allow password change requests.
This section displays the various interfaces the user may use to access the MOVEit DMZ server, and which credentials are required to successfully authenticate. The username is required for all authentication methods, so is not listed. Each major interface type (HTTP, FTP, SSH, and Mobile) provides a link which allows administrators to edit the permissions and required credentials for each interface for the user (to override, for this user, the organization's default interface policy). (These settings will not preserved if you change the default policy and apply changes to all existing users.)
SSL Client Certs are managed by clicking either the HTTP Policy link or the FTP Policy link, and SSH Client Keys are managed by clicking the SSH Policy link. In addition, if there are any pending SSL Client Certs or SSH Client Keys attached to the user which need to be accepted or denied, notes will appear under the HTTP Server, FTP Server, and/or SSH Server sections indicating the number of pending certs and/or keys.
Note: The required PIN length (that is, whether it is 4, 5, or 6 digits) is inherited from the Org default "Required PIN length" policy (set in Web Interface - Settings - Security Policies - Interface).
Administrators have the ability to limit user access to particular IP and hostname addresses. By default, the IP and hostnames from which a particular user or administrator may access MOVEit DMZ are controlled by the organization's default remote access settings (available on the Settings page), but Administrators may specify custom access rules by selecting a CUSTOM ruleset and then defining that ruleset.
The "IP/Hostname" line displays the current remote access ruleset being used by the user, either Default Ruleset or Custom Ruleset. Also available are two links. Click "Select Ruleset" to choose either the Default Ruleset or a Custom Ruleset. Click the "View Rules" to either see how the default rules apply to this user or to change custom rules.
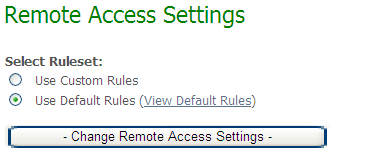
The "View Custom Rules" link will be present only after you select "Use Custom Rules."
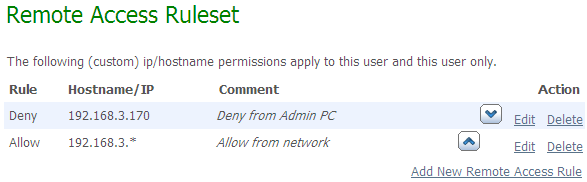
The interface for adding, editing, and deleting custom IP/Hostname rules is similar to the default IP/Hostname interface available through the organizational settings page.
Administrators may also prevent the user from signing on multiple times using the same interface from different client machines. The Multiple Signons line displays whether the user is allowed to do so, and also provides a link for changing the setting for the user.
When multiple signons are prohibited, a user will not be allowed to sign on from more than one IP address to the same interface. For example, a browser session for the "jsmith" user would be allowed from 192.168.1.1, but a second concurrent "jsmith" browser session from 192.168.2.2 would be refused. At the same time, however, "jsmith" could sign on using an FTP client from 192.168.2.2, because the web and FTP are two different interfaces.
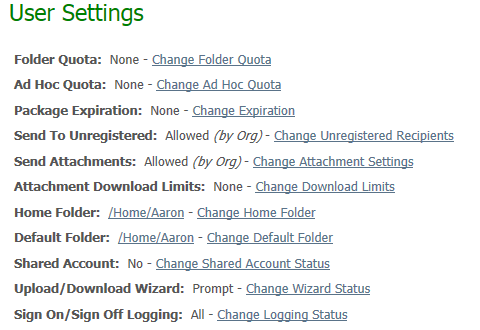
Administrators can set a quota for a user that will prevent the user from uploading more than a certain amount of bytes to the DMZ system. The quota may be configured in kilobytes or megabytes, and applies to files this user uploads or creates. For example, a user with a 5 megabyte quota could upload a 2 megabyte file and a 3 megabyte file, but not two 3 megabyte files. As files are deleted from the system (often by the processing organization), the user is allowed to upload additional files. For example, a user with a 5 megabyte quota could upload 4 megabyte files on Monday, Tuesday and Wednesday as long as the processing organization deleted them from MOVEit DMZ each night.
Hint: The file attachment quota for packages is set in the "Ad Hoc Quota" section.
Administrators can set quotas on the amount of bytes a user can send in packages, which includes attached files and any notes. A quota can be set on the total number of bytes in packages sent within a given number of days. A quota can also be set on the number of bytes a user can send in any one package.
Expire packages after: If users are allowed to set per package expiration values (see 'Which users can set specific expirations on their packages?' under "Aging and Expiration" in Web Interface - Settings - Ad Hoc Transfer - Maintenance), then Administrators can set a personalized default value.
Note: The Mobile apps and web do not offer senders the per package option. The "default" set here becomes the absolute value always used to expire packages sent from this user from mobile. It overrides the organization's default setting, which also is used as an absolute value to expire packages sent from mobile. See Which users can set specific expirations on their packages? under "Aging and Expiration" in Web Interface - Settings - Ad Hoc Transfer - Maintenance.
Expire packages after: Shows the default number of days, after which the package expires and files are no longer available to recipients. Administrators can set a custom value for a user.
Normally, whether or not a user can send packages to unregistered users is governed by the settings of the organization, and possibly the settings of the groups that user is a member of. However, it can also be changed here, to deny a user from being able to send to unregistered users, even if that user would normally be allowed to. The current permissions for this user are shown here, and the user's 'Send to Unregistered' setting can be changed by clicking on the 'Change Prohibition' link.
Whether or not a user can add file attachments to packages is governed by the settings of the organization, and possibly the settings of the groups that user is a member of, but administrators can use this setting to prohibit a user from adding files to packages.
Shows the default number of times recipients of a package can download a file. This is the total number of downloads for all recipients, so if the limit is 10 and one recipient downloads a file 10 times, then the file will no longer be available for download. Administrators can set a custom download limit for a user by setting a default value and maximum for downloads for the user.
Note: The Mobile apps and web do not offer senders the per package option. The "default" set here becomes an absolute value always used to limit downloads of packages sent from mobile. It overrides the org per user default setting and the , which will otherwise be used as the absolute value always used to limit downloads from mobile. See Which users can set specific download limits on their packages? under "Sending Files" in Web Interface - Settings - Ad Hoc Transfer - Content.
A user's home folder is the folder to which the user gains automatic permissions, depending on the Default Home Folder Access organization setting. Normally, the home folder is also used as the default folder, meaning it is the folder the user gets to navigate to and upload to by default.
By default, when a new user is added, MOVEit DMZ creates a folder with the user's Full Name in the Home folder, for example: /Home/John Smith.
To change the home folder, select from the available folders, then click Change Home Folder. If you want to set the user to have no home folder, select None from the Home Folder list.
By default, a user's home folder is their initially selected choice when uploading a file to the DMZ system. A link is also provided on their Home page to go directly to their home folder. This setting allows an administrator to change the "default" folder for a user to any other folder on the system. When a user goes to upload a file, this folder will be the folder initially selected as the destination. A link will also appear on the user's Home page which takes them directly to the default folder. The default folder is also where the user will be placed when signing on to the DMZ system through the FTP or SSH servers.
The Edit Default Folder Settings section of this page contains settings related to the user's default folder:
User accounts are typically used by a single user only, and have full access to the files that they upload, and the log entries that they have generated. Sometimes a single user account needs to be used by several users though, in which case each individual shouldn't necessarily be able to see the activities of other people using the account. The Shared Account setting should be enabled for such accounts. When enabled, this option will hide files uploaded to write-only folders by all people sharing the account. (Files uploaded to write-only folders are normally visible to the user that uploaded them.) It will also hide log entries created by the user, and prevent the user from altering account settings such as email address and password.
This section determines whether or not a user will be prompted to install the Upload/Download Wizard if they do not already have it installed. When the Prompt to install Upload/Download Wizard setting is set to Yes, users who do not have the wizard installed will be prompted about it, and asked if they want to install it, after they sign on. When set to No, users will not be prompted about the wizard, though they will still be able to use the wizard if it is already installed. Users may also install the wizard from their Account Options page.
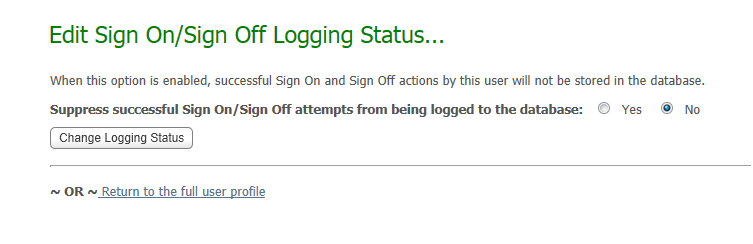
For automated user accounts that frequently access MOVEitDMZ via FTP/SSH to look for new files, you can turn off database logging of successful sign-on/sign-off events. This will prevent the performance issues and timeouts from excessive logging. The default logging setting is "All", meaning all events, both successes and failures, will be logged. The alternative logging setting is "Failures Only".
To turn off - or turn back on - successful Sign On/Sign Off logging for the user, click the Change Logging Status link. In the Edit Sign On/Sign Off Logging Status page, click Yes or No for the setting ("Suppress successful Sign On/Sign Off attempts from being logged to the database"). Click the "Change Logging Status" button. Then click "Return to the full user profile" link to return to the main user profile page.
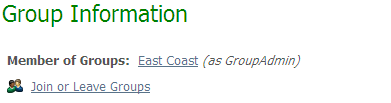
This section allows an Admin and some GroupAdmins to add and remove this user to/from groups. If this user is a GroupAdmin or has another special relationship to a group, it will also be noted here.
The address book for a user contains the list of users and groups this user will be able to send packages to if Ad Hoc Transfer is enabled.
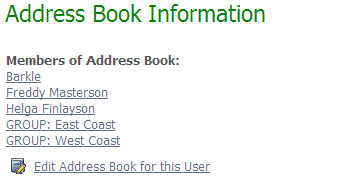
Clicking on the "Edit Address Book for this User" link will bring up the Edit Address Book page for the user. Here, the list of users and groups that this user will be able to send packages to can be added to or modified.
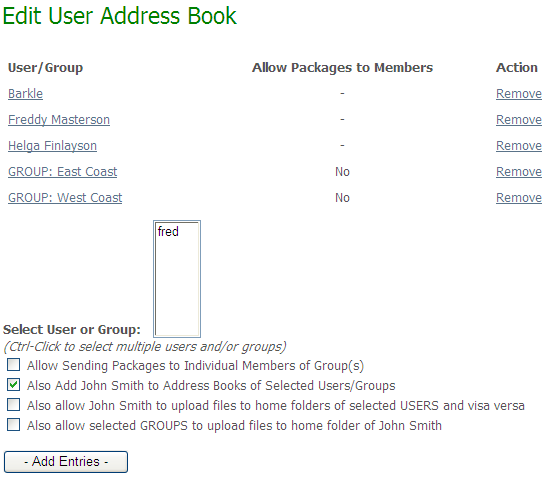
The current list of users and groups in this user's address book is shown at the top of the page. The list has three columns:
A list of users and groups who can be added to this user's address book is also shown. Selecting one or more users and/or groups from the list and then clicking the "Add Entries" button will add those users and groups to this user's address book. Multiple selection is possible by holding down the Control key when selecting entries. Additional options are available to modify the result of adding the new entry: