Adding and editing a Recurring Action
To add or edit a recurring action:
Go to the Recurring Actions Library (menu ).
Recurring Actions Library displays.
- Click 'add' (
 ) to create a new recurring action or select and action you want to modify, then click 'edit' (
 ).
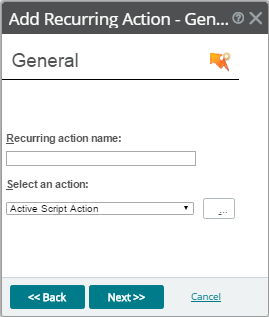
). Add Recurring Action - General dialog displays.
- Complete the following, then click on .
- . Name displayed in Recurring Actions Library.
- . Action type this action is based on. (Web Alarm actions cannot be used as recurring actions.)
Add Recurring Action - Schedule dialog displays.
- Complete the following boxes:
- . Select this option to activate the recurring action schedule; clear the option to disable the recurring report schedule.
- . Select to access the Weekly Blackout Schedule dialog.
- . Select the time, day, and month or months you want the action to fire. The action only fires during the month selected from this list. Quarterly actions can be created by selecting the last day of each quarter. If a day is entered that does not exist in a selected month (September 31, February 30, etc.) then the action is fired on the last day of that month.
- . Select the day and time each week you want the action to fire.
- Click to save your changes.