Resiliency - Installation - Installation Steps

The following steps should be performed to install MOVEit DMZ Resiliency. The printable "Resiliency - Installation - Worksheet" usually helps provide you with answers to questions raised by the installation procedure.

The entire installation process should take about one to two hours for each node, plus the time it will take to back up all MOVEit DMZ nodes.

Section 1: Install MOVEit DMZ on Node 1 (Get Common Configuration File If New Install)

You will generally face one of two installation situations:

In both situations the aim of this section is the the same: a working but isolated MOVEit DMZ server.

Existing MOVEit DMZ server

You already have a working but isolated MOVEit DMZ server. To continue you need to locate the paths and credentials you used while setting up this server; you will be retyping these again on other nodes.

New Servers

  1. Install MOVEit DMZ on Node 1, but when you are on the last screen of a successful installation be sure you SAVE a copy of the "MOVEit DMZ Installation Configuration/INI file" ("MOVEitDMZ_Install.INI"). Depending on your installation selections, this file may end up saved as "C:\MOVEitDMZ_Install.INI" on Node 1 (look here first) and/or saved into MOVEit DMZ's System Organization, where it will only be accessible through a SysAdmin account.
  2. Finish your MOVEit DMZ installation by opening the web browser link and creating your first production organization.
  3. When the regular MOVEit DMZ installation completes, copy your "MOVEitDMZ_Install.INI" file to the "C:" drive of all other MOVEit DMZ nodes as "C:\MOVEitDMZ_Install.INI" and move on to the next section.

Section 2: Install MOVEit DMZ on Nodes 2, 3, 4, etc. (Use the New Install Common Configuration File, If Available)

Run the MOVEit DMZ installation package on nodes 2, 3, 4, etc. If you were able to use a common configuration file from a new install, you should be prompted for little, if any, information. If you were working from an existing MOVEit DMZ installation you should fill use the same path, password and other values in all installation prompts. In either case, you should end up with a number of identically installed MOVEit DMZ servers.

Section 3: Back Up All MOVEit DMZ Nodes

At this point you should perform a full backup or disk image of each of your MOVEit DMZ nodes. In extreme cases the fastest way to correct MOVEit DMZ Resiliency installation mistakes is to rebuild an afflicted node and having a perfect copy of the system in this state is usually quite helpful. Disk imaging tools include g4u - a Linux ISO-based image-to-FTP tool, Norton Live State (or Norton Ghost), and Powerquest Disk Image.

Section 4: Install and Configure MOVEit DMZ Resiliency

The following procedure should be performed on each node. You should start with Node 1, continue on Node 2 and finally continue on any (optional) application nodes numbered 3, 4, etc.

Having a filled out copy of the "Resiliency - Installation - Worksheet" is highly recommended before continuing. This worksheet provides specific answers to the prompts you will encounter while installing MOVEit DMZ Resiliency on each node.

If you will be using a "cluster or backbone network" (to isolate NAS traffic, etc.), fill in the "cluster" IP addresses of each node rather than their "application" IP addresses when prompted.

  1. Launch the MOVEit DMZ Resiliency installation program
  2. Enter the Resiliency "SQL" and "Web" node numbers for this node
    If this is Node #1 enter '1' and '1', if this is Node #2 enter '2' and '2'. If this is an application node bearing a node number of 3 or more, enter '0' and '3' (or more).

    resil_install_enternodenumbers.png (7938 bytes)

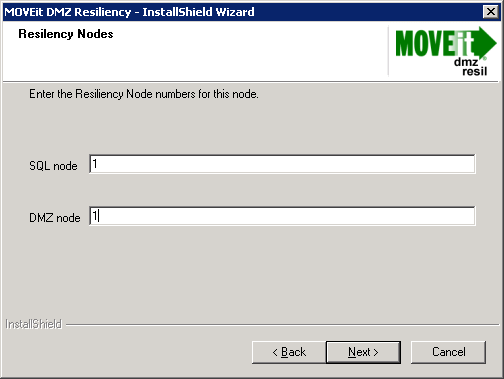
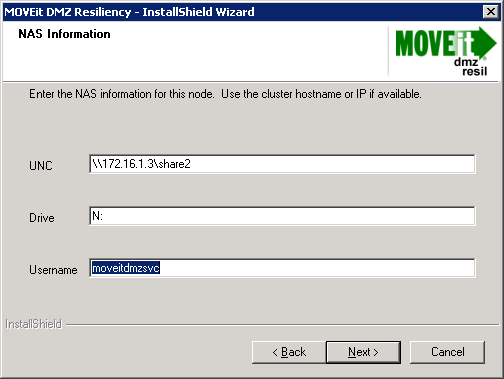
  3. Enter the NAS information for this node
    The three pieces of information here refer to how the shared information on the NAS is accessed. You must enter the same NAS information on all MOVEit DMZ nodes.
    • The UNC should be in the form: \\<computer-name>\<share-name>, where <computer-name> is the network name of the computer which is the NAS, and <share-name> is the name of the shared directory which will hold the MOVEit DMZ file system.
    • Drive Letter should be a letter to assign to the path to the NAS. MOVEit DMZ Resiliency will mount the shared directory on the NAS to this drive letter using the UNC above. The format should be the familiar two-character sequence of a letter followed by a colon. MOVEit DMZ defaults this value to "N:", but you can pick any unassigned drive letter.
    • Username is the username of the account you created/selected on the NAS that has full access to MOVEit DMZ's shared folder. If the username is part of a domain, enter it with the domain name first, separated by a back-slash. Certain MOVEit DMZ services will also be altered so they run under this username as well. Warning: using domain credentials here to access the NAS will only work if this node is already a member of the Windows domain the NAS belongs to.

    resil_install_enternasinfo.png (8603 bytes)

  4. Please enter the password for the NAS user
    This is just the password associated with the NAS Username. Make sure you enter the same value on every node.
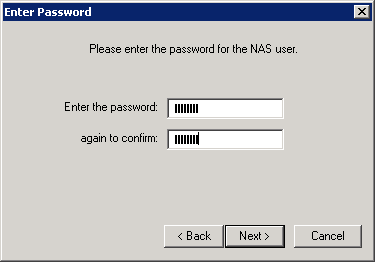
    resil_install_enternasuserpass.png (2723 bytes)

  5. OK to add user?
    This YES/NO prompt asks whether you want to add the username entered above as a local Windows account on this computer. In most cases you will answer YES. However, if the username entered above was a domain user, or if the NAS username you typed in already exists on this computer, you should answer NO.
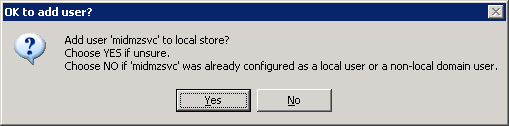
    resil_install_addusertolocalstore.png (3923 bytes)

  6. OK to Copy?
    This YES/NO prompt asks if you want to copy all the files from the locally installed MOVEit DMZ "Non-Web" directory (usually C:\MOVEitDMZ\) to a directory of the same name on the NAS. Choose "Yes" if this instance is node 1. Otherwise choose "No" if this instance is node 2,3,4, etc....

    resil_install_copyfoldertonas.png (3499 bytes)

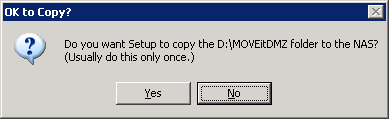
  7. Enter the other MySQL node IP address
    This is where you identify how this node will access the MOVEit DMZ Database nodes. If this is a Database node (i.e., 1 or 2), you will be prompted for the other Database node's cluster/backbone IP address. If this is an Application node (i.e., "3" or greater), enter the cluster/backbone IP addresses of both Nodes 1 and 2.
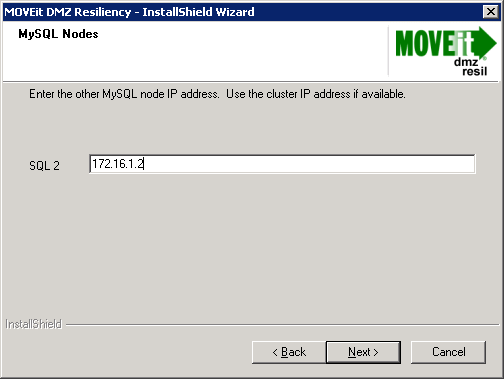
    resil_install_enterothermysqlnode.png (7855 bytes)

  8. Copy Database?
    This prompt does not display on Node 1 or Nodes 3+. Answer "Yes" if this is Node 2.

    resil_install_copydatabase.png (3359 bytes)

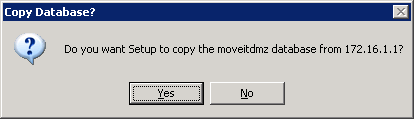
  9. Enter the IP Addresses for all Web nodes
    If this is a Database node (i.e., 1 or 2), you will enter the cluster/backbone IP Addresses (not host names) of all MOVEit DMZ nodes other than this one. In the simplest case (two nodes), this will be the IP address of the other node and will automatically be filled in from the prompt above. The answers to this prompt will grant access to the two Database nodes from all other MOVEit DMZ nodes. Nodes 3+ will not see this prompt.

    resil_install_enterotherdmznodes.png (8745 bytes)

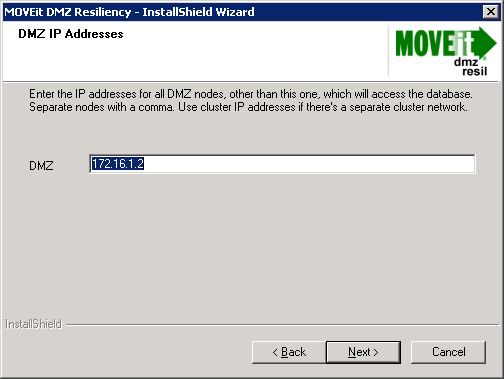
  10. Enter the MySQL 'Root' User Password
    This step is normally skipped by modern installations. If you are prompted, enter the "root" MySQL password (not the "moveitdmz" MySQL password) used when the original MOVEit DMZ software was installed on this machine.
  11. Time Synchronization
    The MOVEit DMZ resilient nodes must maintain time synchronization. You will need to set each Node to an external time source in this step, unless every node is a member of a domain, in which case the external time source should be left blank. If your server has outbound Internet access, you may wish to use one of the public servers listed at http://ntp.isc.org/bin/view/Servers/NTPPoolServers. Also, avoid using a Windows Server 2003 host as a time server. Bugs in the time server software for this version of Windows prevent it from being a reliable time source.

    resil_install_timesync.png (8591 bytes)

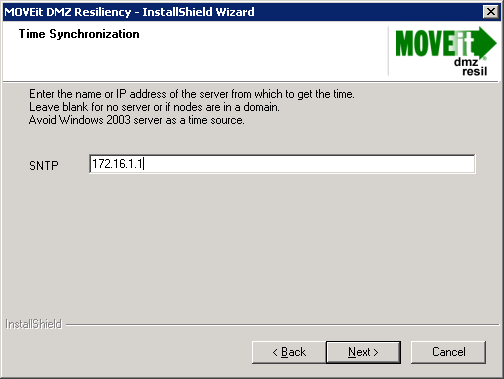
  12. Choose Destination Location
    Confirm the location of the 'MOVEit' folder in the 'Program Files' folder. There is rarely any reason this would be changed from the current value established when MOVEit DMZ was initially installed.
  13. Select Program Folder
    Confirm the location of the 'MOVEit' folder in the Start menu. There is rarely any reason this would be changed from the current value established when MOVEit DMZ was initially installed.
  14. Ready to start copying files
    This is the final prompt before performing the installation tasks. If you need to go back and change any values, now is the time.
  15. (The software installs...)
    • Before copying files
      At this point, MOVEit DMZ Resiliency Installation performs the following tasks in preparation for copying files:
      • Stopping all the MOVEit DMZ related services.
      • Adding the NAS user to the local machine, if selected.
      • Mounting the NAS share on the configured drive letter using the username/password.
      • Creating the "Non-Web" directory and status sub-directory on the NAS.
      If any of these tasks fail, you will be prompted whether to continue the installation or abort.
    • File Installation ("Copying...")
      Setup next performs up to three copy operations. First, it copies programs and files which are part of the Resiliency installation into their locations on the local system. Next, if selected, the "Non-Web" directory structure and files are copied from this system to the NAS. Finally, if selected, the MySQL database from the master node (node 1) is copied.
    • Configuring Services
      The installation process now reconfigures the services which support MOVEit DMZ. Most services are changed from starting automatically to manually. MOVEit DMZ Resiliency will handle starting and stopping the services as necessary. Some services are configured to execute under the NAS username so that they have direct access to the MOVEit DMZ file system on the NAS.
    • Updating the Website
      At this point, the Resiliency Installation launches a utility program which reconfigures the MOVEit DMZ website to point to the web files on the NAS, to run under the NAS username, and to have execute access rights to the modules loaded from the NAS. The utility program displays a list of websites configured, one of which should be MOVEITDMZ. Select that website and press the OK button. If this is an existing website, and it was originally configured as the default website, then select 'Default Web Site' and press OK.
    • Configuring MySQL
      Next, the installation configures MySQL (if this is a SQL node) to grant access from the IP addresses configured above. MySQL is also set up to be able to run in Master/Slave mode.
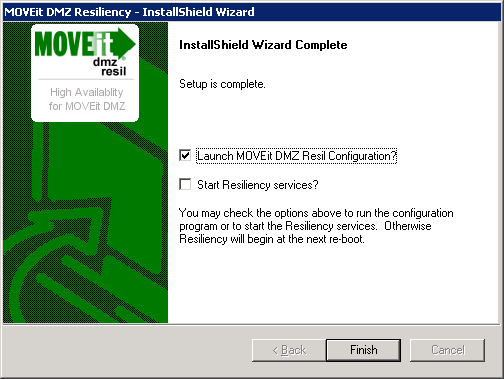
  16. Launch DMZ Config (But Do Not Start Services)
    Finally, as the installation completes, you may have the option to begin resiliency services immediately, or to run the MOVEit DMZ Configuration Utility. In most cases, you will want to wait until all the resilient nodes are installed before starting services, but you should launch the DMZ Config utility so you can be ready to perform the steps in the next section.

    Note: Do not run the DMZ check until nodes are synchronized (Section 6) or an error may occur if you are not using a valid DNS entry for the base URL.

    resil_install_final.png (12263 bytes)

Section 5 (Optional): Reload MOVEit DMZ Configuration From Backup File

If you are migrating an old MOVEit DMZ configuration to a MOVEit DMZ Resiliency configuration on new hardware, then now is the time to reload the existing files. Using the MOVEit DMZ Backup Utility, back up the existing configuration (usually, with files) from the old MOVEit DMZ system and restore it to Node 1 (and only Node 1) of the resilient system. When the DMZRestore utility is run on Node 1, it will automatically put the proper materials in Resiliency-replicable locations; the following section will complete the replication process to all nodes.

If you restored an backup file created by an older version, remember to perform a "repair" operation through the MOVEit DMZ installation/upgrade program (opt to reapply database updates) on the Primary node.

Section 6: Synchronize and Start Nodes

  1. Synchronize the databases for the first time
    Before MOVEit DMZ can process application requests, you must get the Primary and Secondary database nodes synchronized. If you did not have the install launch the MOVEit DMZ Configuration Utility, you can run it from the Start menu. Select the "Status" tab. In the Resiliency Services section, press the "Show Settings" button, then select the "Resiliency" tab and press the "Advanced" button. This should display the status of all the nodes and an array of buttons for controlling resilient operations.

    configutil_resiliencyadvanced.gif (12214 bytes)

    To start the databases:

    1. On Node 1, click the "Record Replication" button. This will start the MySQL service and save the resynchronization information in the status file for the other node to use. (This button, as well as all the other buttons in this section, will display a prompt describing the functions that will be performed and giving a YES/NO option to continue.)
    2. On Node 1, click the "Make me Master" button. This will put MySQL in "master" mode.
    3. On Node 2, click the "Copy Database" button. This will start the MySQL service and initiate a series of steps which will safely copy the database and put the local MySQL in a state to replicate from the master.
    4. On Node 2, click the "Use Replication Info" button to configure the MySQL database to replicate from the log file name and position stored by the other node in the status file.
    5. On Node 2, click the "Make me DB Slave" button to start MySQL up in slave mode.
  2. Synchronize the registry for all nodes
    On Node 1, click the "Send Registry" button to store all the current registry settings for other nodes to read and replicate. This is especially important when upgrading an existing MOVEit DMZ system which already has one or more Organizations defined.
  3. Synchronize the certificates for all nodes
    1. On all nodes, click the appropriate "Start" button to start the Helper service.
    2. On Node 1, click the "Send Certificates" button to store all the current SSL certificates for other nodes to read and replicate.
    3. If you are using a production SSL certificate, you may also need to manually update each node's IIS "moveitdmz" web site to use the correct production SSL certificate. (Otherwise each IIS web site will continue to use MOVEit DMZ's test certificate for 90 days.)
  4. Start up resiliency services
    In the MOVEit DMZ Configuration Utility, from the Resiliency tab Advanced page, start the "DB resil" and "Web resil" services on each of the nodes. These services will start all MOVEit DMZ's application services as necessary. If all is well, you should see the status update for each node until all of them display a status of "All OK".

Section 7: Testing Failover

To quickly simulate a failover, unplug the Cluster Network cable from Node 1 (the current Primary node). Within 30 seconds to 2 minutes the Secondary node should be promoted to Primary status and all services should once again be available. (The "30 seconds to 2 minutes" value is configurable in the "Configuration Utility: Resiliency Tab" tab.)

To switch Node 1 back to Primary status, plug the Cluster Network cable back in, wait for Node 1 to become the Secondary node and then unplug the Cluster Network cable from Node 2 (the current Primary). Wait for Node 1 to become Primary, plug the cable back into Node 2 and then wait for Node 2 to become the Secondary node again.

Logging

Installation operations are written to the "C:\MOVEitDMZResil_Install.log" file.