Configuring alerts for passive monitors
In this example, you create and assign an E-mail action to a SNMP Trap passive monitor. The SNMP Trap monitor listens for any (all) or specific SNMP traps. SNMP traps enable an SNMP device agent to notify on significant events through unsolicited SNMP messages, or traps.
To configure an E-mail alert for an SNMP Trap passive monitor:
First, create the E-mail action.
- From the WhatsUp Gold web interface, go to Admin > Actions. The Action Library appears.
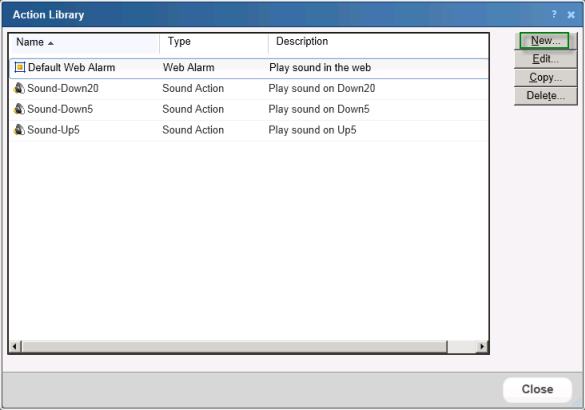
- Click New. The Select Action Type dialog appears.
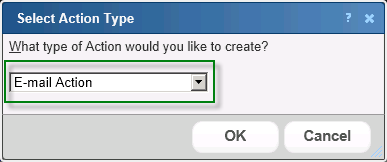
- Select E-mail Action, then click OK. The New Email Action dialog appears.
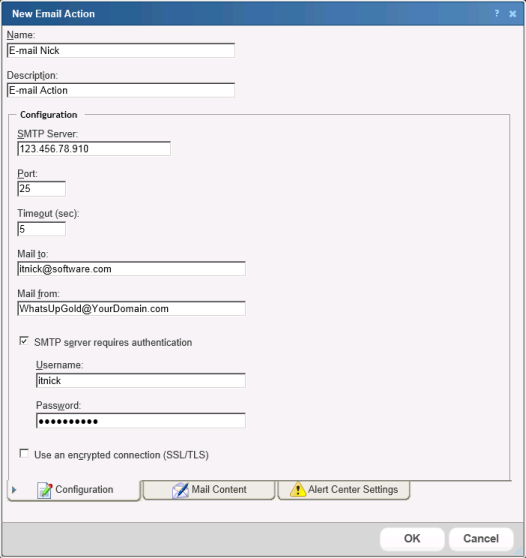
- Enter the appropriate information in the dialog boxes:
- Name. Enter a unique name for the action. This name displays in the Action Library.
- Description. (Optional) Enter additional information about the action. This description displays next to the action in the Action Library.
Complete the information on the Configuration tab. This tab contains options pertaining to the action e-mail destination.
- SMTP Server. Enter the IP address or Host (DNS) name of your e-mail server (SMTP mail host).
- Port. Enter the port number on which the SMTP server is listening.
- Timeout (sec). Enter the length of time WhatsUp Gold attempts to connect to the selected device. When the time you enter is exceeded without connecting, a timeout occurs and WhatsUp Gold stops trying to connect to the SMTP server. This is considered a failed connection.
- Mail To. Enter the email addresses to which you want to send the alert. Email addresses must be fully qualified. You can enter multiple addresses, separated by a semi-colon (;), comma (,), or the [SPACE] character. The address should not contain brackets, braces, quotes, or parentheses.
- Mail From. Enter the email address you want to appear in the From field of the e-mail that is sent by the Email action.
- SMTP server requires authentication. Check this option if your SMTP server uses authentication. This enables the Username and Password boxes.
The Email action supports three authentication types:
- CRAM-MD5
- login
- plain
The authentication type is not configurable. It is negotiated with the SMTP server automatically.
- Username. Enter the username for SMTP authentication.
- Password. Enter the password of the username for authentication.
- Use an encrypted connection (SSL/TLS). Check this option if your SMTP server requires the data to be encrypted over a TLS connection (formerly known as SSL).
Complete the information on the Mail Content tab. This tab contains options pertaining to the action email message content.
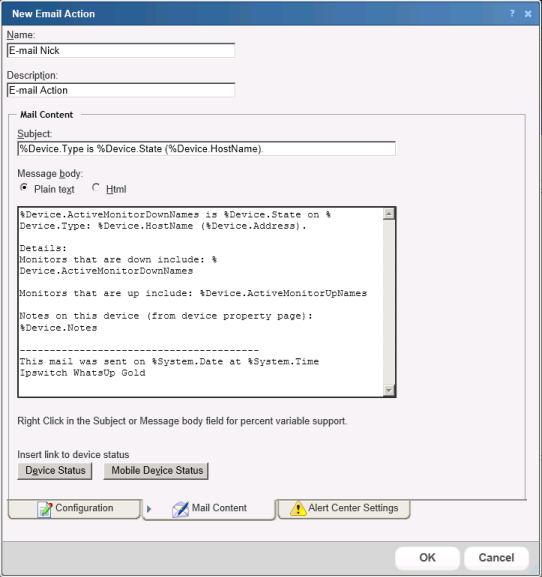
- Subject. Enter a text message or edit the default message. You can use percent variable codes to display specific information in the subject.
- Message body. Enter a text message or edit the default message. You can use percent variable codes to display specific information in the message body.
For the purpose of this example, we are not using the dialog's Alert Center tab. Click OK to save the E-mail action configuration.
- After configuring the action, assign it to the appropriate device. In this example, Nick assigns it to his mail server device.
After configuring the action, assign it to the appropriate device. In this example, Nick assigns it to his mail server device.
- In the Details or Map View, right-click a device, then click Properties. The Device Properties dialog appears.
- Click Passive Monitors. The Device Properties - Passive Monitors dialog appears.
- Select the SNMP Trap passive monitor, then click Edit. The monitor properties dialog appears.

- Click Add. The Action Builder appears.
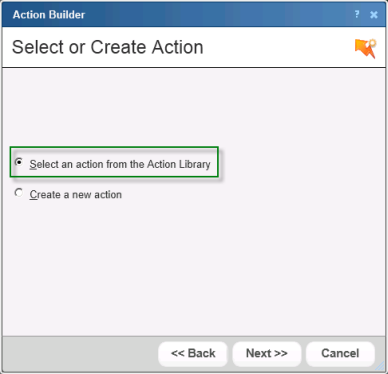
- Select the Select an action from the Action Library option, then click Next. The Select Action dialog appears.
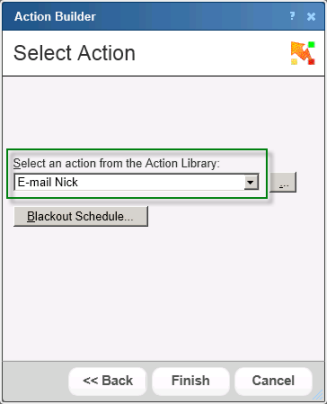
- Select the E-mail Action, then click Finish. The Setup Actions for Passive Monitors dialog appears.

- Click Finish. The Device Properties dialog appears.
- On the Device Properties dialog, click OK to save changes.