Working with dashboard views
WhatsUp Gold comes with a several pre-configured dashboard views. You can create your own dashboard views to use in addition to the pre-configured views. You can create as many as you feel necessary to organize your system for efficient reporting.
- To manage views for multiple users, see Managing dashboard views.
- To switch to a different dashboard view, click another view tab in the dashboard.

- To add a new dashboard view, click the + in the row of tabs to open the New Dashboard View.

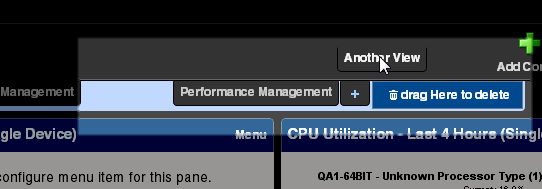
- To delete a view, click and drag the associated tab. The Delete tab appears to the right of the tab row. Drag the view tab you want to delete over the Delete tab. The view is removed.

- Click Edit View to edit the settings for the current dashboard view.
- Click Add Content to open the Add Content pane and select additional reports to add to the current view.
- To change the order of the dashboard view tabs, click and drag a tab to a new location.
To create a new dashboard view:
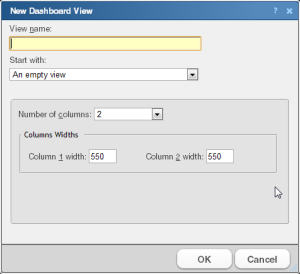
- From the dashboard where you want to add the new view, click +. The New Dashboard View dialog appears.

- Enter the appropriate information in the following fields:
- View name. Type a relevant name for the new view. This name is used to identify a view in the dashboard, so select a name that is meaningful and helps you to distinguish it from other views.
- Start with. Select the existing dashboard view type on which to base the new view, or select An empty view to create a new custom view.
- Number of columns. Enter a value for the number of columns you wish to have in the new dashboard view (1 -4). Keep in mind, the more columns you include, the smaller the data displayed inside a dashboard.
Note: This option appears only when you start with an empty view.
- Column widths. Enter a width for each of the dashboard view columns. You are prompted for a value for each column you selected in the previous step.
Note: This option appears only when you start with an empty view.
- Click OK to save changes.
To edit a dashboard view:
- Click Edit View in the toolbar. The Edit Dashboard View dialog appears.
- Enter the appropriate information in the following fields:
- View name. The dashboard title as it appears on the dashboard view tab and in the Manage Dashboard Views dialog.
- Number of columns. The number of columns in the dashboard.
- Column width. The width of each column in the dashboard (in pixels).
- Click OK to save changes.