This topic shows you how to install the Ipswitch Analytics Server. You must install the Ipswitch Analytics Server on a dedicated physical or virtual machine. A PostgreSQL database will be installed on this machine as part of the Ipswitch Analytics Server installation. Do not install the Ipswitch Analytics Server on a machine that hosts a MOVEit server or a MOVEit database.
You do not have to stop your MOVEit server(s) to install the Ipswitch Analytics Server.
- Sign in as an Administrator on a Windows Server machine. This will be the account under which all Ipswitch Analytics Server processing occurs.
- Download the Ipswitch Analytics Server installation file: Ipswitch_Analytics_Base_v1.exe
- Open Ipswitch_Analytics_Base_v1.exe.
- If the machine does not have all of the prerequisite software installed, you may see this screen:
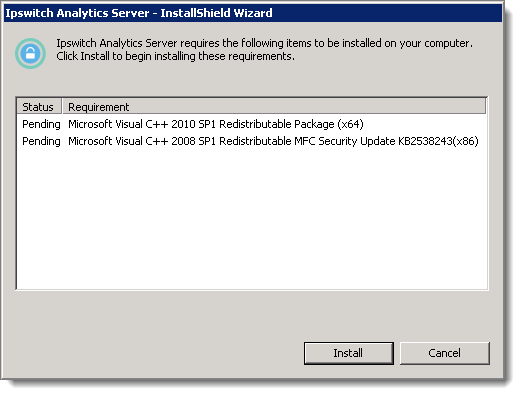
Click Install to install these necessary items.
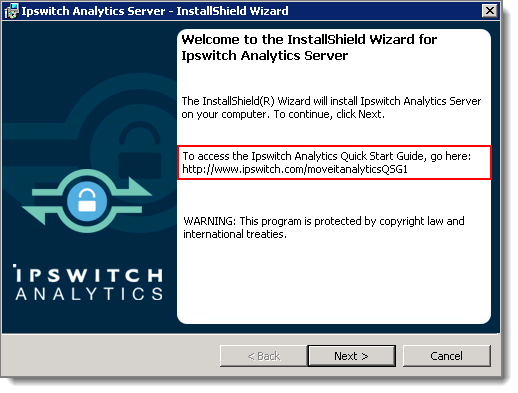
The installer opens. Click Next.
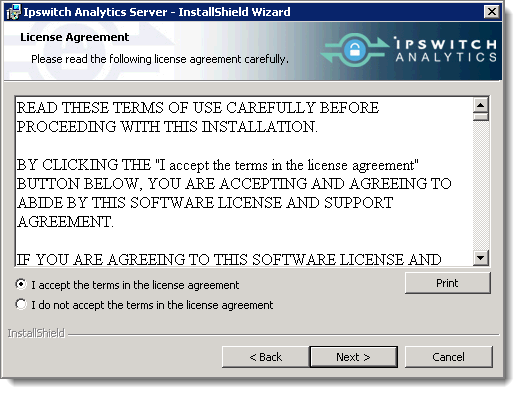
- Accept the license agreement and click Next.
- Select a Destination Folder where all Ipswitch Analytics Server installation files will install. By default, the Ipswitch Analytics Server installs into c:\Program Files\Ipswitch\Analytics Server. Click Change... to select a different directory.
Caution: Do not specify a destination on a drive that is mapped to a network drive.
Note: You will set a location for the Ipswitch Analytics Server database files in a later step.
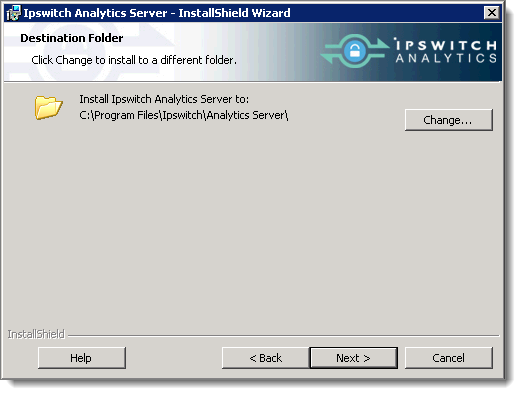
Click Next.
- Enter the Analytics Server Settings. These settings allow System Administrator login access to the Ipswitch Analytics server.
- System Administrator Username: Enter the name of a user who will have access to all of Ipswitch Analytics. This user will be the only System Administrator initially. The default name is sysadmin.
- System Administrator Password: Enter a password for the System Administrator. Valid passwords must be between 8 and 20 characters in length, contain at least one number and one non-number, and must not contain the System Administrator Username.
- System Administrator Email Address (and confirmation): Enter an email address for the System Administrator.
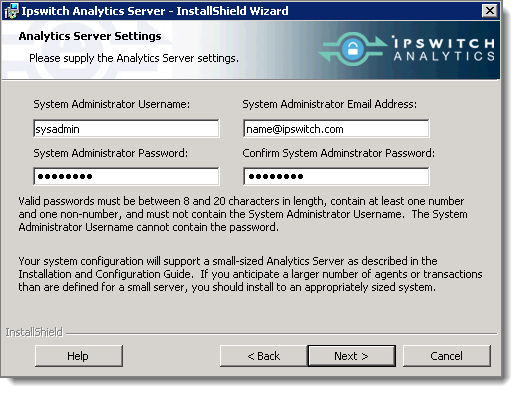
The size of your system is indicated on this screen also. The installer detects your RAM size automatically to make the determination: 4 GB: Small, 8 GB: Medium, or 16 GB: Large.
Click Next.
- Enter the Agent Access Settings:
- Agent Access Username: This is the name that all Ipswitch Analytics Agents will use when authenticating with the Ipswitch Analytics Server. The default name is "feeder" (allowed characters: 'a'-'z', '0'-'9' and '_'). This user account is only for Agent access to the Ipswitch Analytics Server. This username will display in the Users module once you sign in to Ipswitch Analytics.
Tip: You can change the Agent Access Username from the Users module after installation, but you'll also need to modify the Agent install for changes to take effect.
- Agent Access Password (and confirmation): Enter a password for the Agent to use when authenticating with the Ipswitch Analytics Server.
Note: This password uses standards-based, bi-directional AES256 encryption. The password is entered in plaintext during the install process and is encrypted before being stored in the configuration. The password will never be transmitted and it will only be stored in encrypted form.
IMPORTANT: Write down the Agent Access username and password. You will need these when you install an Agent. This username will appear later as a user in the Users module, but it is used only for Agent access to the Ipswitch Analytics Server. If you change this Agent name or password later in the Users module, you must modify the Agent as well.
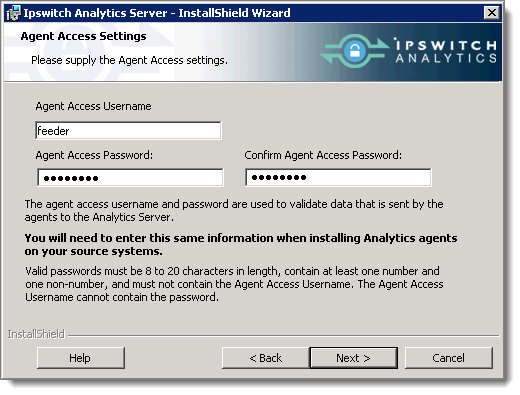
Click Next.
- Enter Tomcat Settings:
- HTTPS Connector Port: Ipswitch Analytics Server is configured to accept HTTPS connections on port 8443 by default. Adhere to your IT security or other IT network policies when configuring ports.
- Ipswitch Analytics Server URL: This is the URL of the Ipswitch Analytics Server, and must be in the format https://hostname or IP address:port/ura. The value that you enter for hostname or IP address must match the Common Name (CN) in your imported keystore certificate.
- For self-signed certificates: The value that you enter for hostname or IP address will be used for the certificate's common name.
- For certificate imports: Specify the fully qualified domain name here. For example, to use a *.ipswitch.com certificate, enter https://analytics.ipswitch.com:8443/ura.
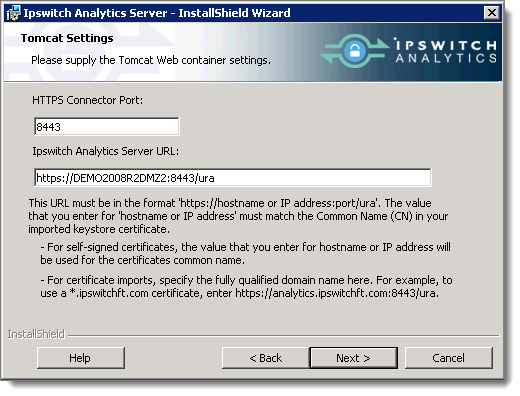
IMPORTANT: Write down this information in the Installation Worksheet.
Click Next. The HTTPS Connector Port will be validated.
- Specify the Tomcat Service User Logon Information. Do you want to use an account other than the Local System account to sign in and run the Ipswitch Analytics Server service?
- No (default): Use the Local System account to sign in and run the Ipswitch Analytics Server service. This will be the account you used to log on to Windows.
- Yes: Specify a different account to sign in and run the service, then click Next. Enter a User name, Password and Group of the user account that will sign in to run the Ipswitch Analytics Server service.
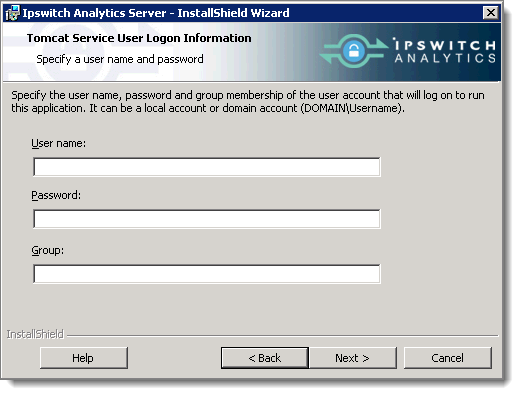
Click Next.
- Select a Tomcat Certificate option for the Ipswitch Analytics Server to validate identity certificates.
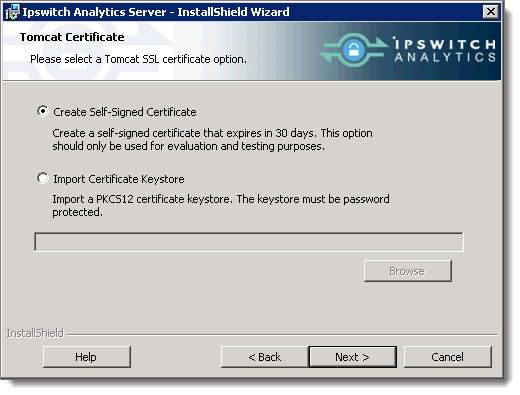
- Create Self-Signed Certificate (for Evaluation Accounts only): This certificate will expire in 30 days. Enter a Password for this certificate that is between 8 to 20 characters in length, contains only alphanumeric characters, and contains at least one number, one lower-case letter, and one upper-case letter. Click Next.
- Import Certificate Keystore: Import an SSL password-protected PKCS12 certificate keystore file with .PFX or .P12 file extension. Click Browse to locate the certificate keystore. The server certificate, private key and chain certificate are generated from this PKCS12 keystore.
IMPORTANT: If you import a certificate keystore that fails, you will not be notified of that fact during installation, and you will not be able to access the Ipswitch Analytics Server. To fix the certificate keystore, you need to update the certificates by modifying the Ipswitch Analytics Server. If you select Import Certificate Keystore, click Next and enter the Password (and confirmation) for the keystore.
- Select a Database Location for the Ipswitch Analytics Server's PostgreSQL database. MOVEit data collected from all Agents will feed into this database. The default location is C:\ProgramData\PGData\. It is recommended that you keep the default location, however, you may click Change... to select a different location.
IMPORTANT: If you select a different database location, it must be a data-specific directory that is not limited to a single user.
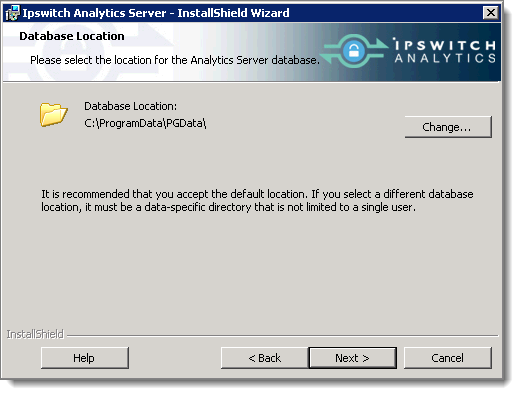
Click Next.
- Enter the Ipswitch Analytics Database Settings. This information is required to run the PostgreSQL database on the Ipswitch Analytics Server. A PostgreSQL database will be installed on this machine as part of the Ipswitch Analytics Server installation.
- Admin Username: This account is not used by the Ipswitch Analytics Server at all, but is created so that a database administrator can access the PostgreSQL database if necessary. It is recommended that you keep the suggested Admin Username.
- Admin Password (and confirmation): Enter a password for the Admin user. Valid passwords must be 8 to 20 characters in length, contain only alphanumeric characters, and contain at least one number and one non-number, and must not contain the username.
- Access Username: This is the account that the Ipswitch Analytics Server web application will use to access the PostgreSQL database, both to insert data that arrives from the Ipswitch Analytics Agents, and to retrieve report and monitor data for display. It is recommended that you keep the suggested Access Username.
- Access Password (and confirmation): Enter a password for the Access user. Valid passwords must be 8 to 20 characters in length, contain only alphanumeric characters, and contain at least one number and one non-number, and must not contain the username.
- Database Port: This port number is predefined to the standard PostgreSQL port, but you can change this to any unused port if desired (the installer will notify you if the port is already in use).
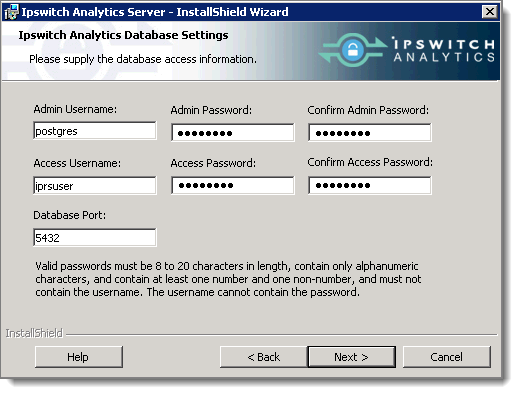
Note: Both the Admin and Access users will be able to access the PostgreSQL database using PostgreSQL tools; however, there should not be any need for you to access to PostgreSQL.
- Review the installation settings, and then click Install.
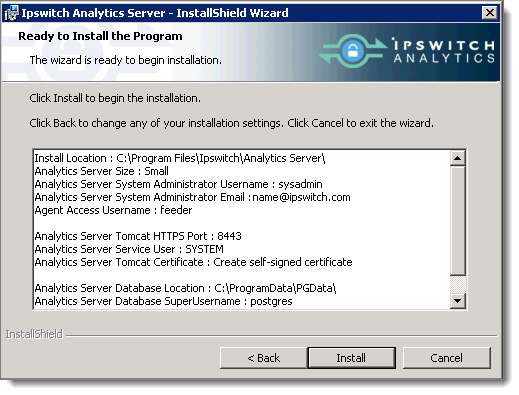
After a few moments, the installation completes.
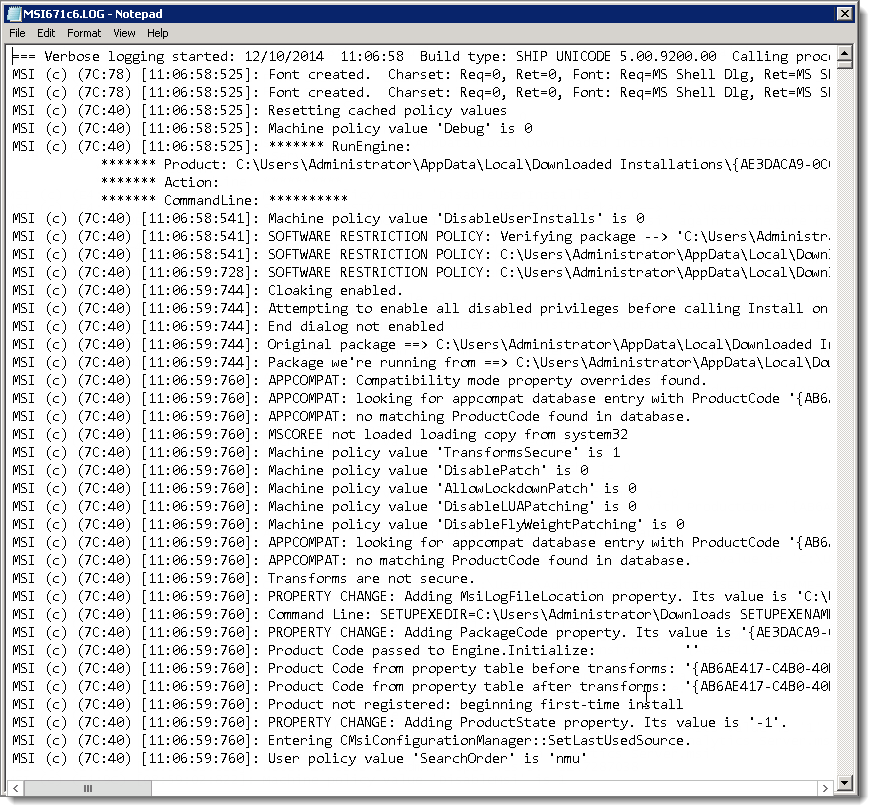
Optional: Click Show the Windows Installer log to view installation details after the installation completes.
Tip: You can view the install log later in the Temp directory
- Click Finish.
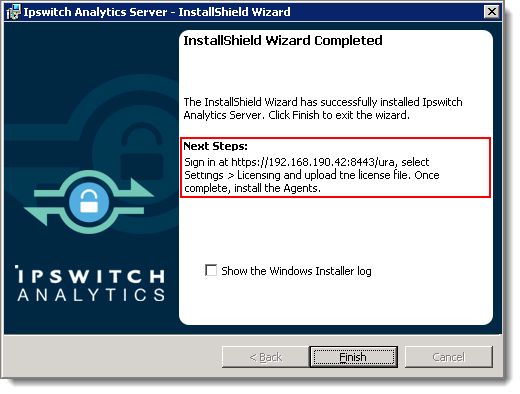
Copy the URL displayed in Next Steps. This is the Analytics Server URL. You will need it to complete the next Step. The URL in the image above is an example only.
If you opted to view the installer log, it will open automatically and look like this:
